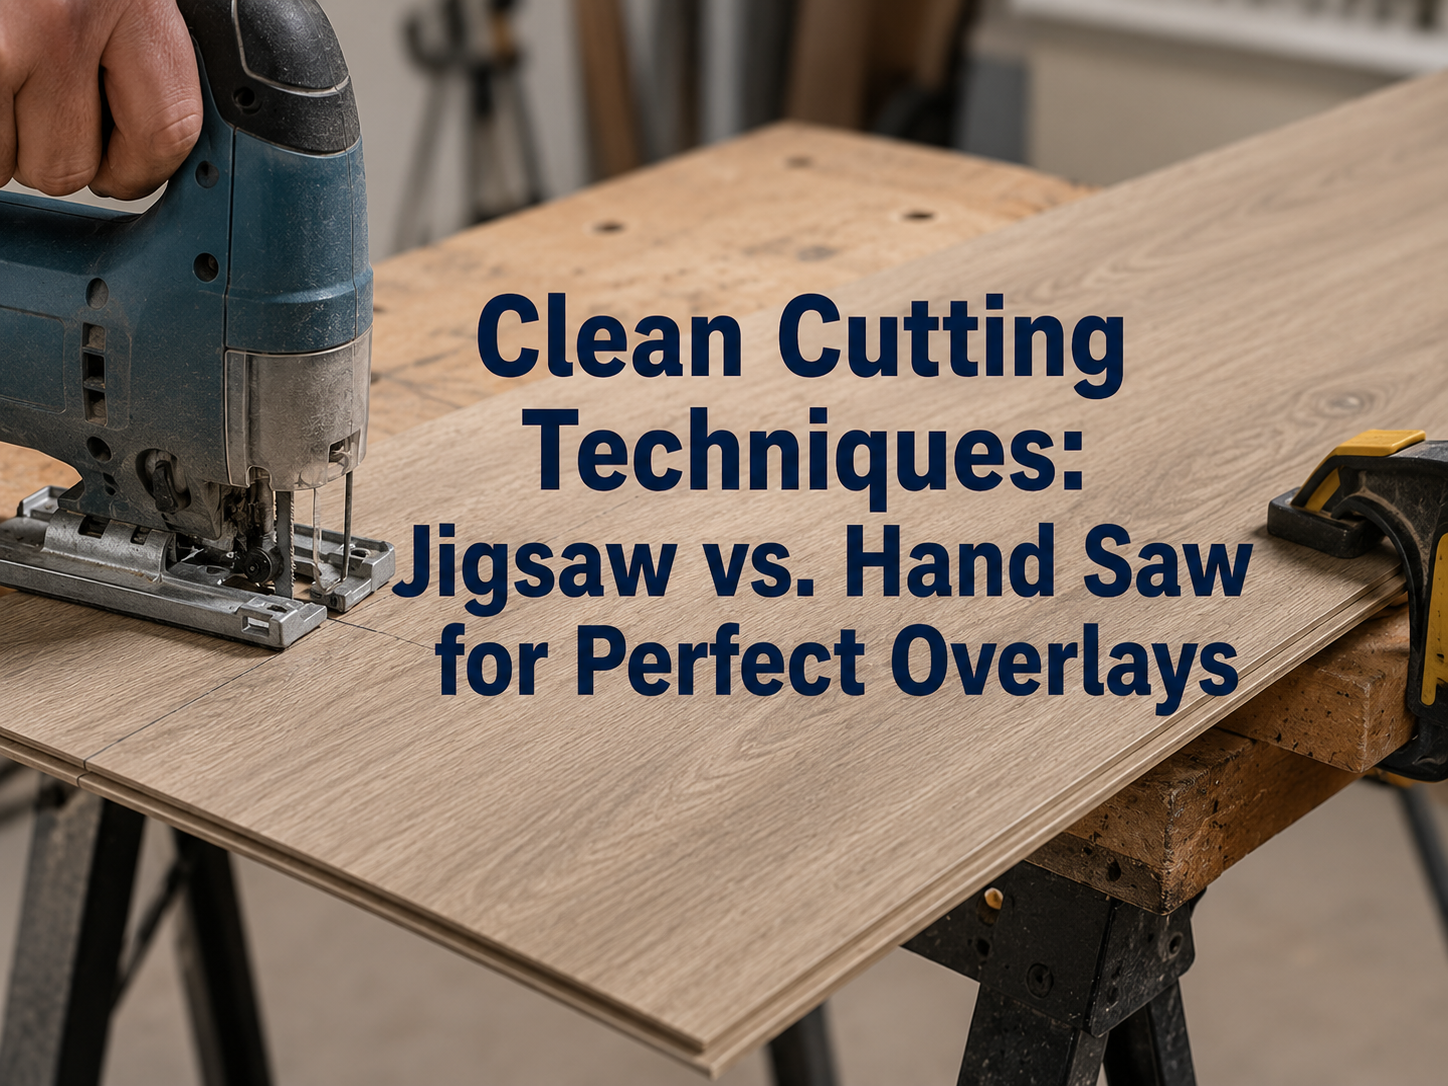
How to Cut Laminate Flooring Without Chipping: Jigsaw vs. Hand Saw Orientation in Tampa Bay Homes
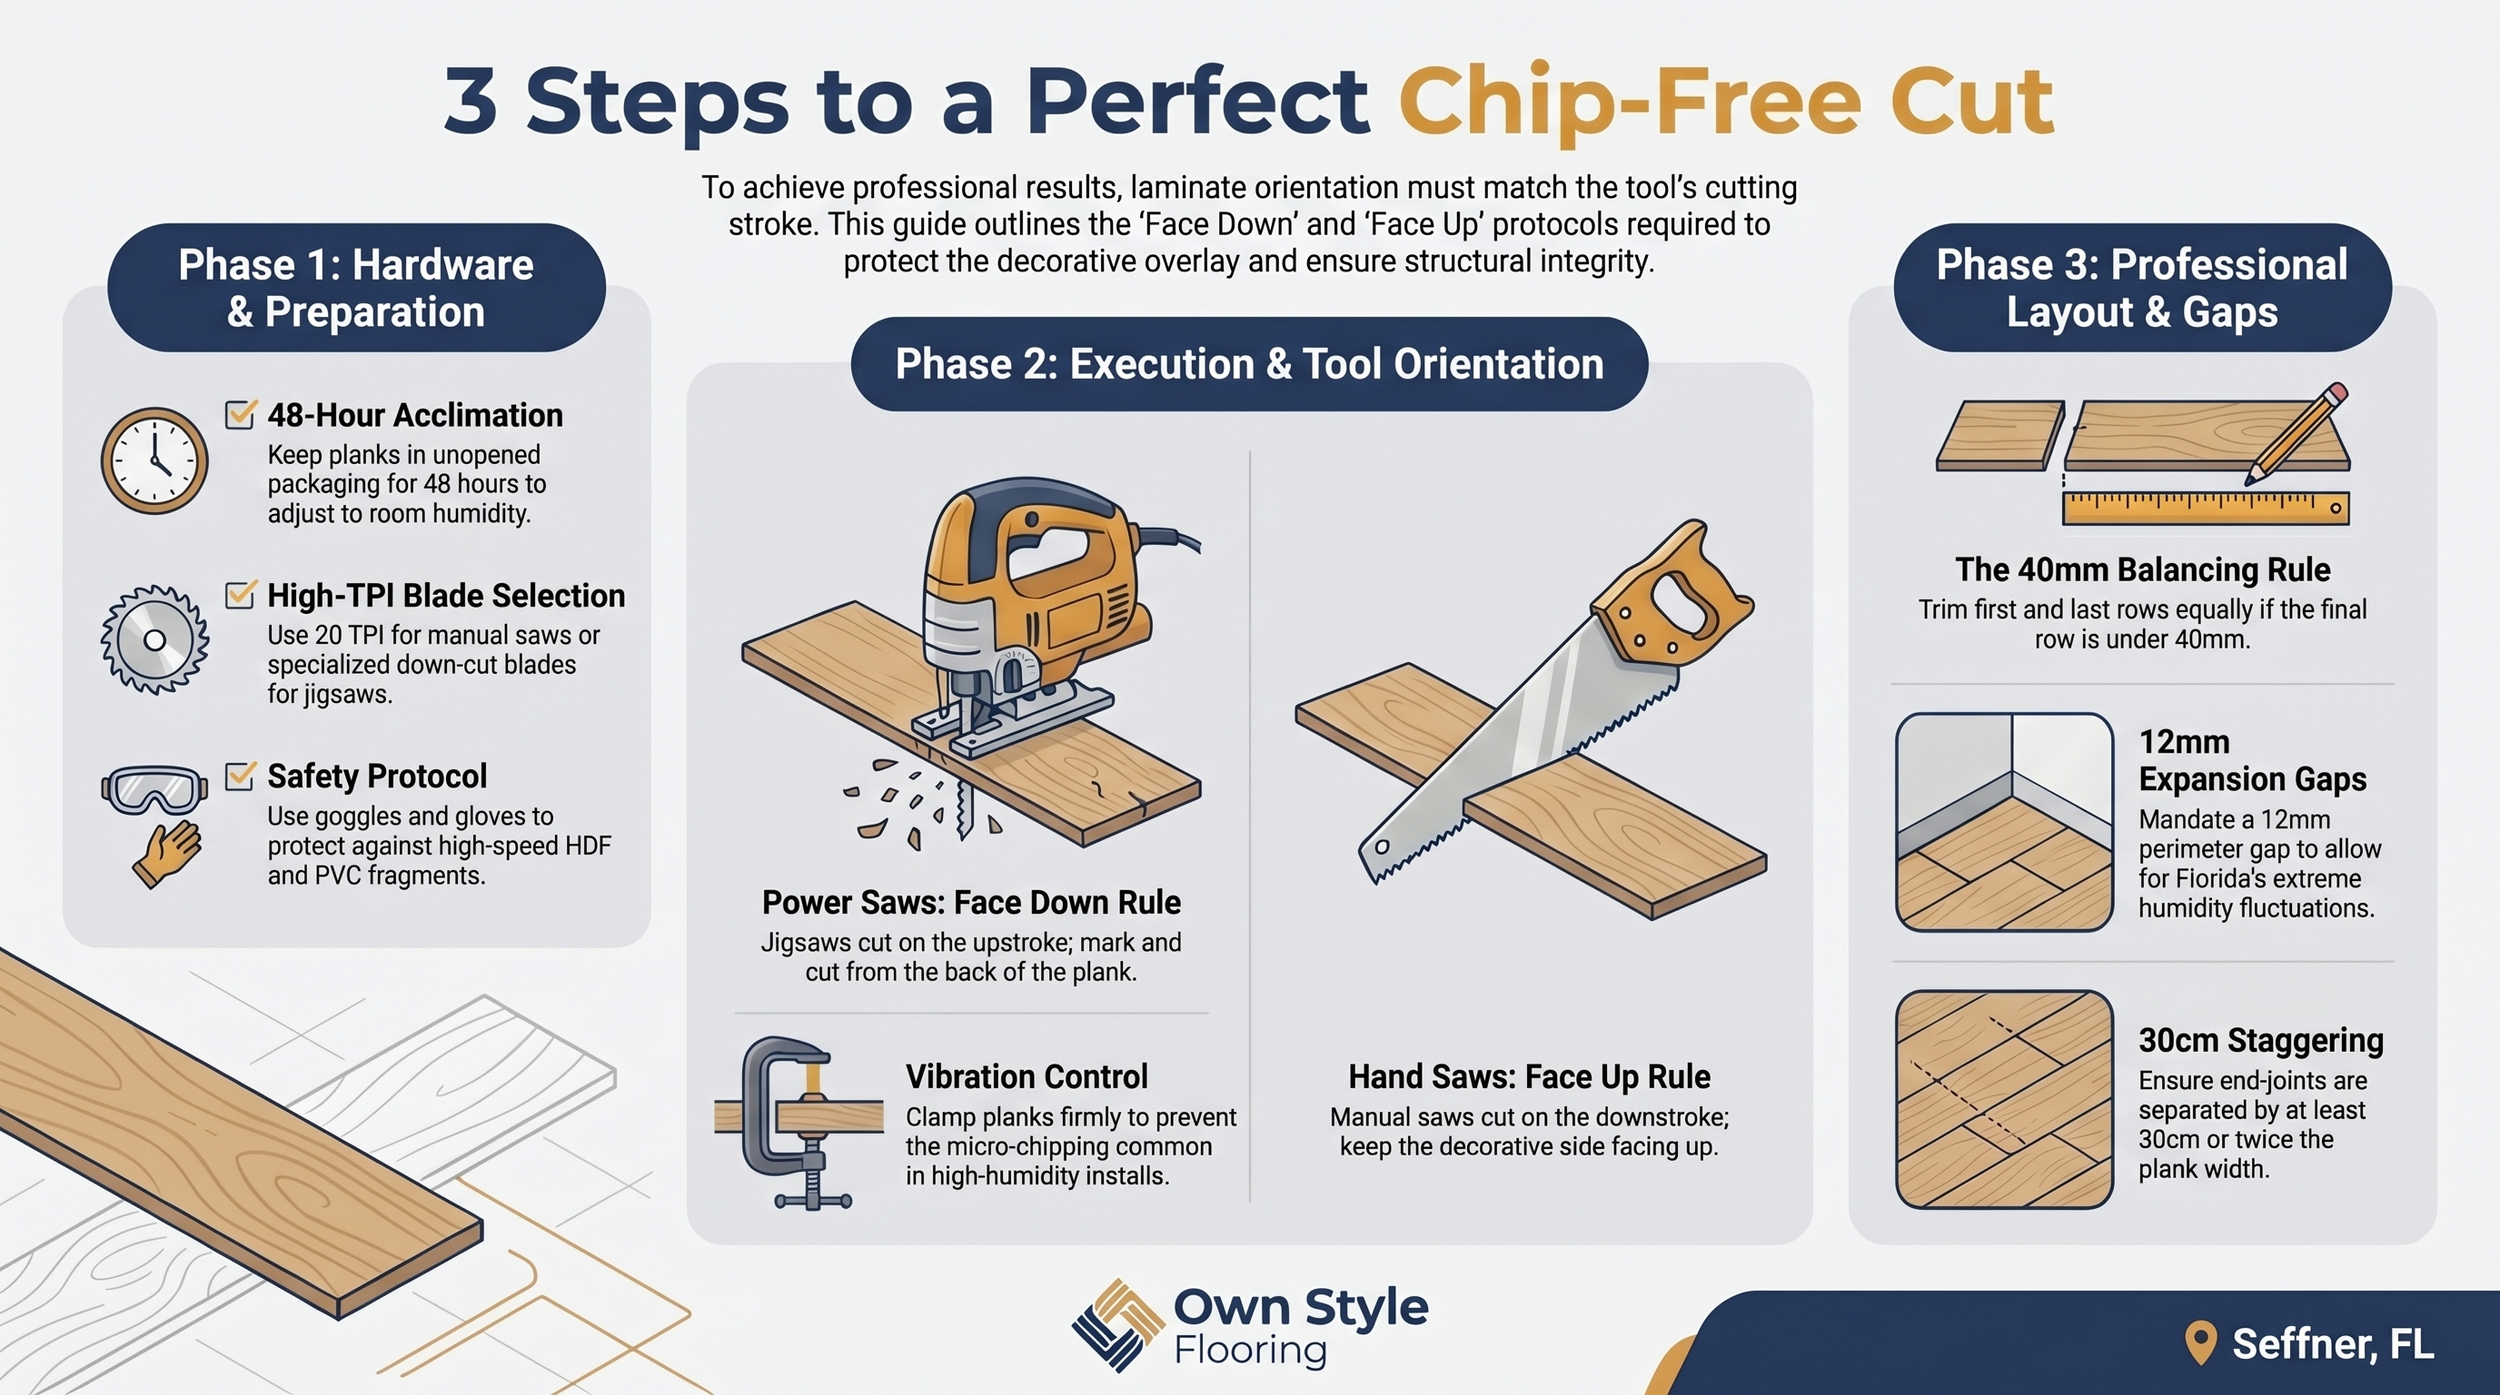
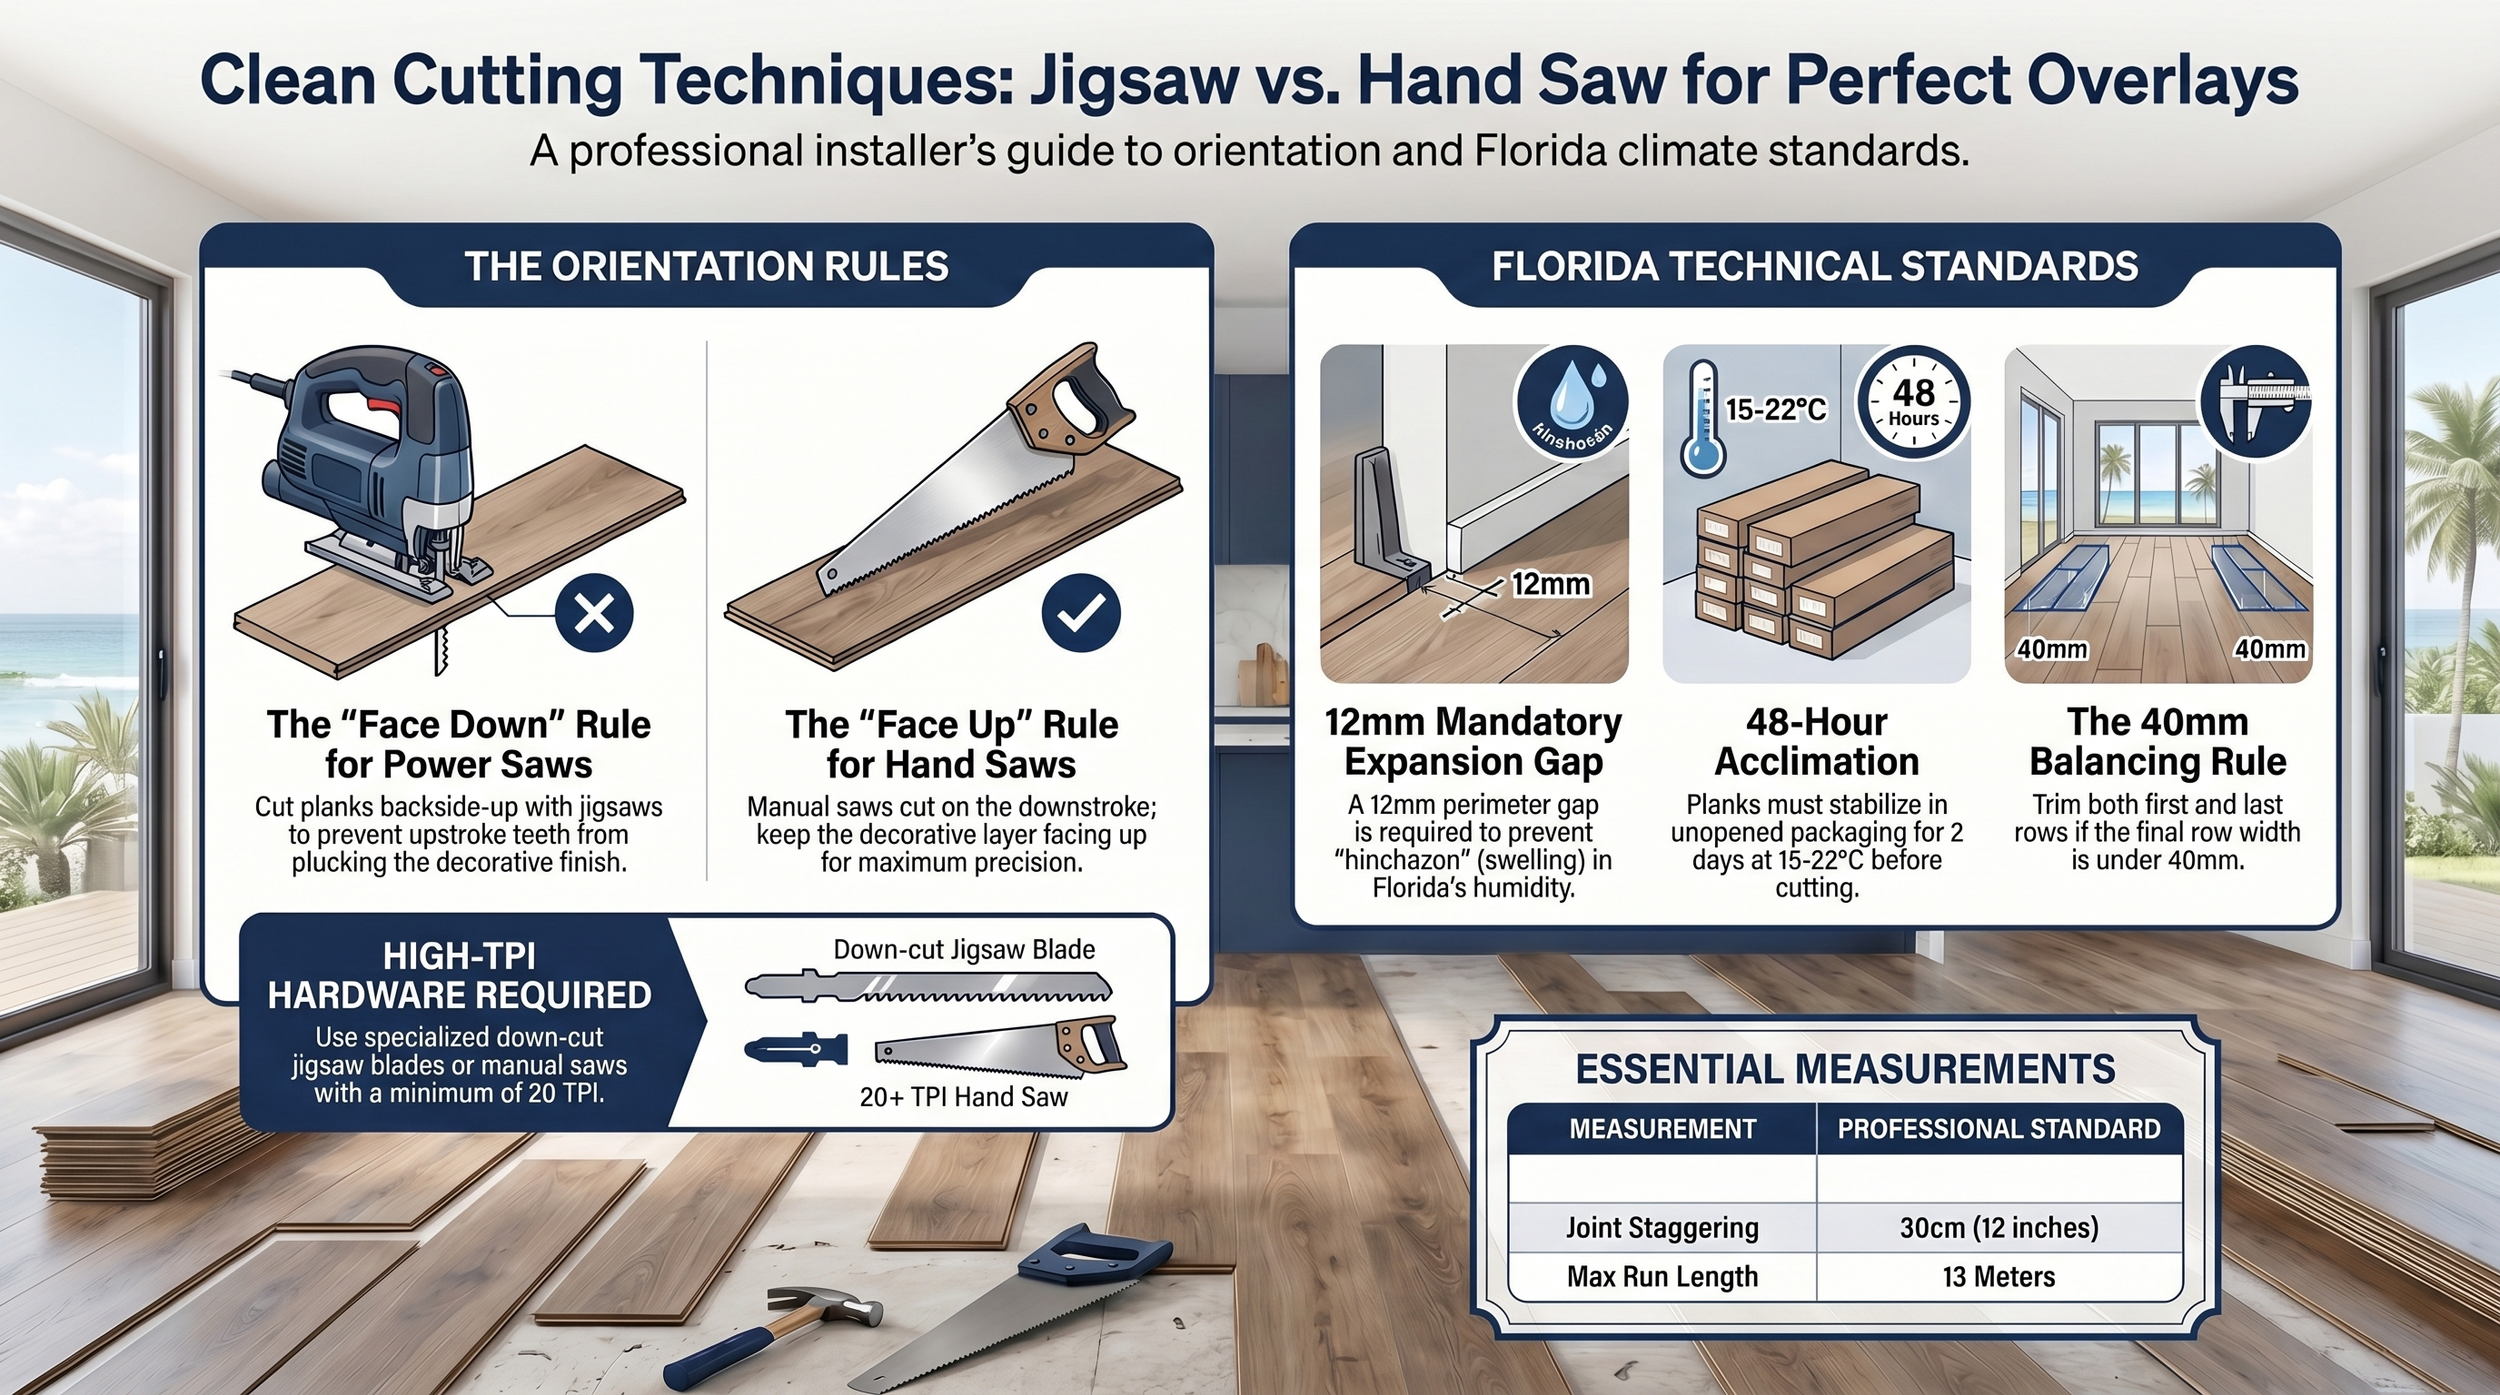
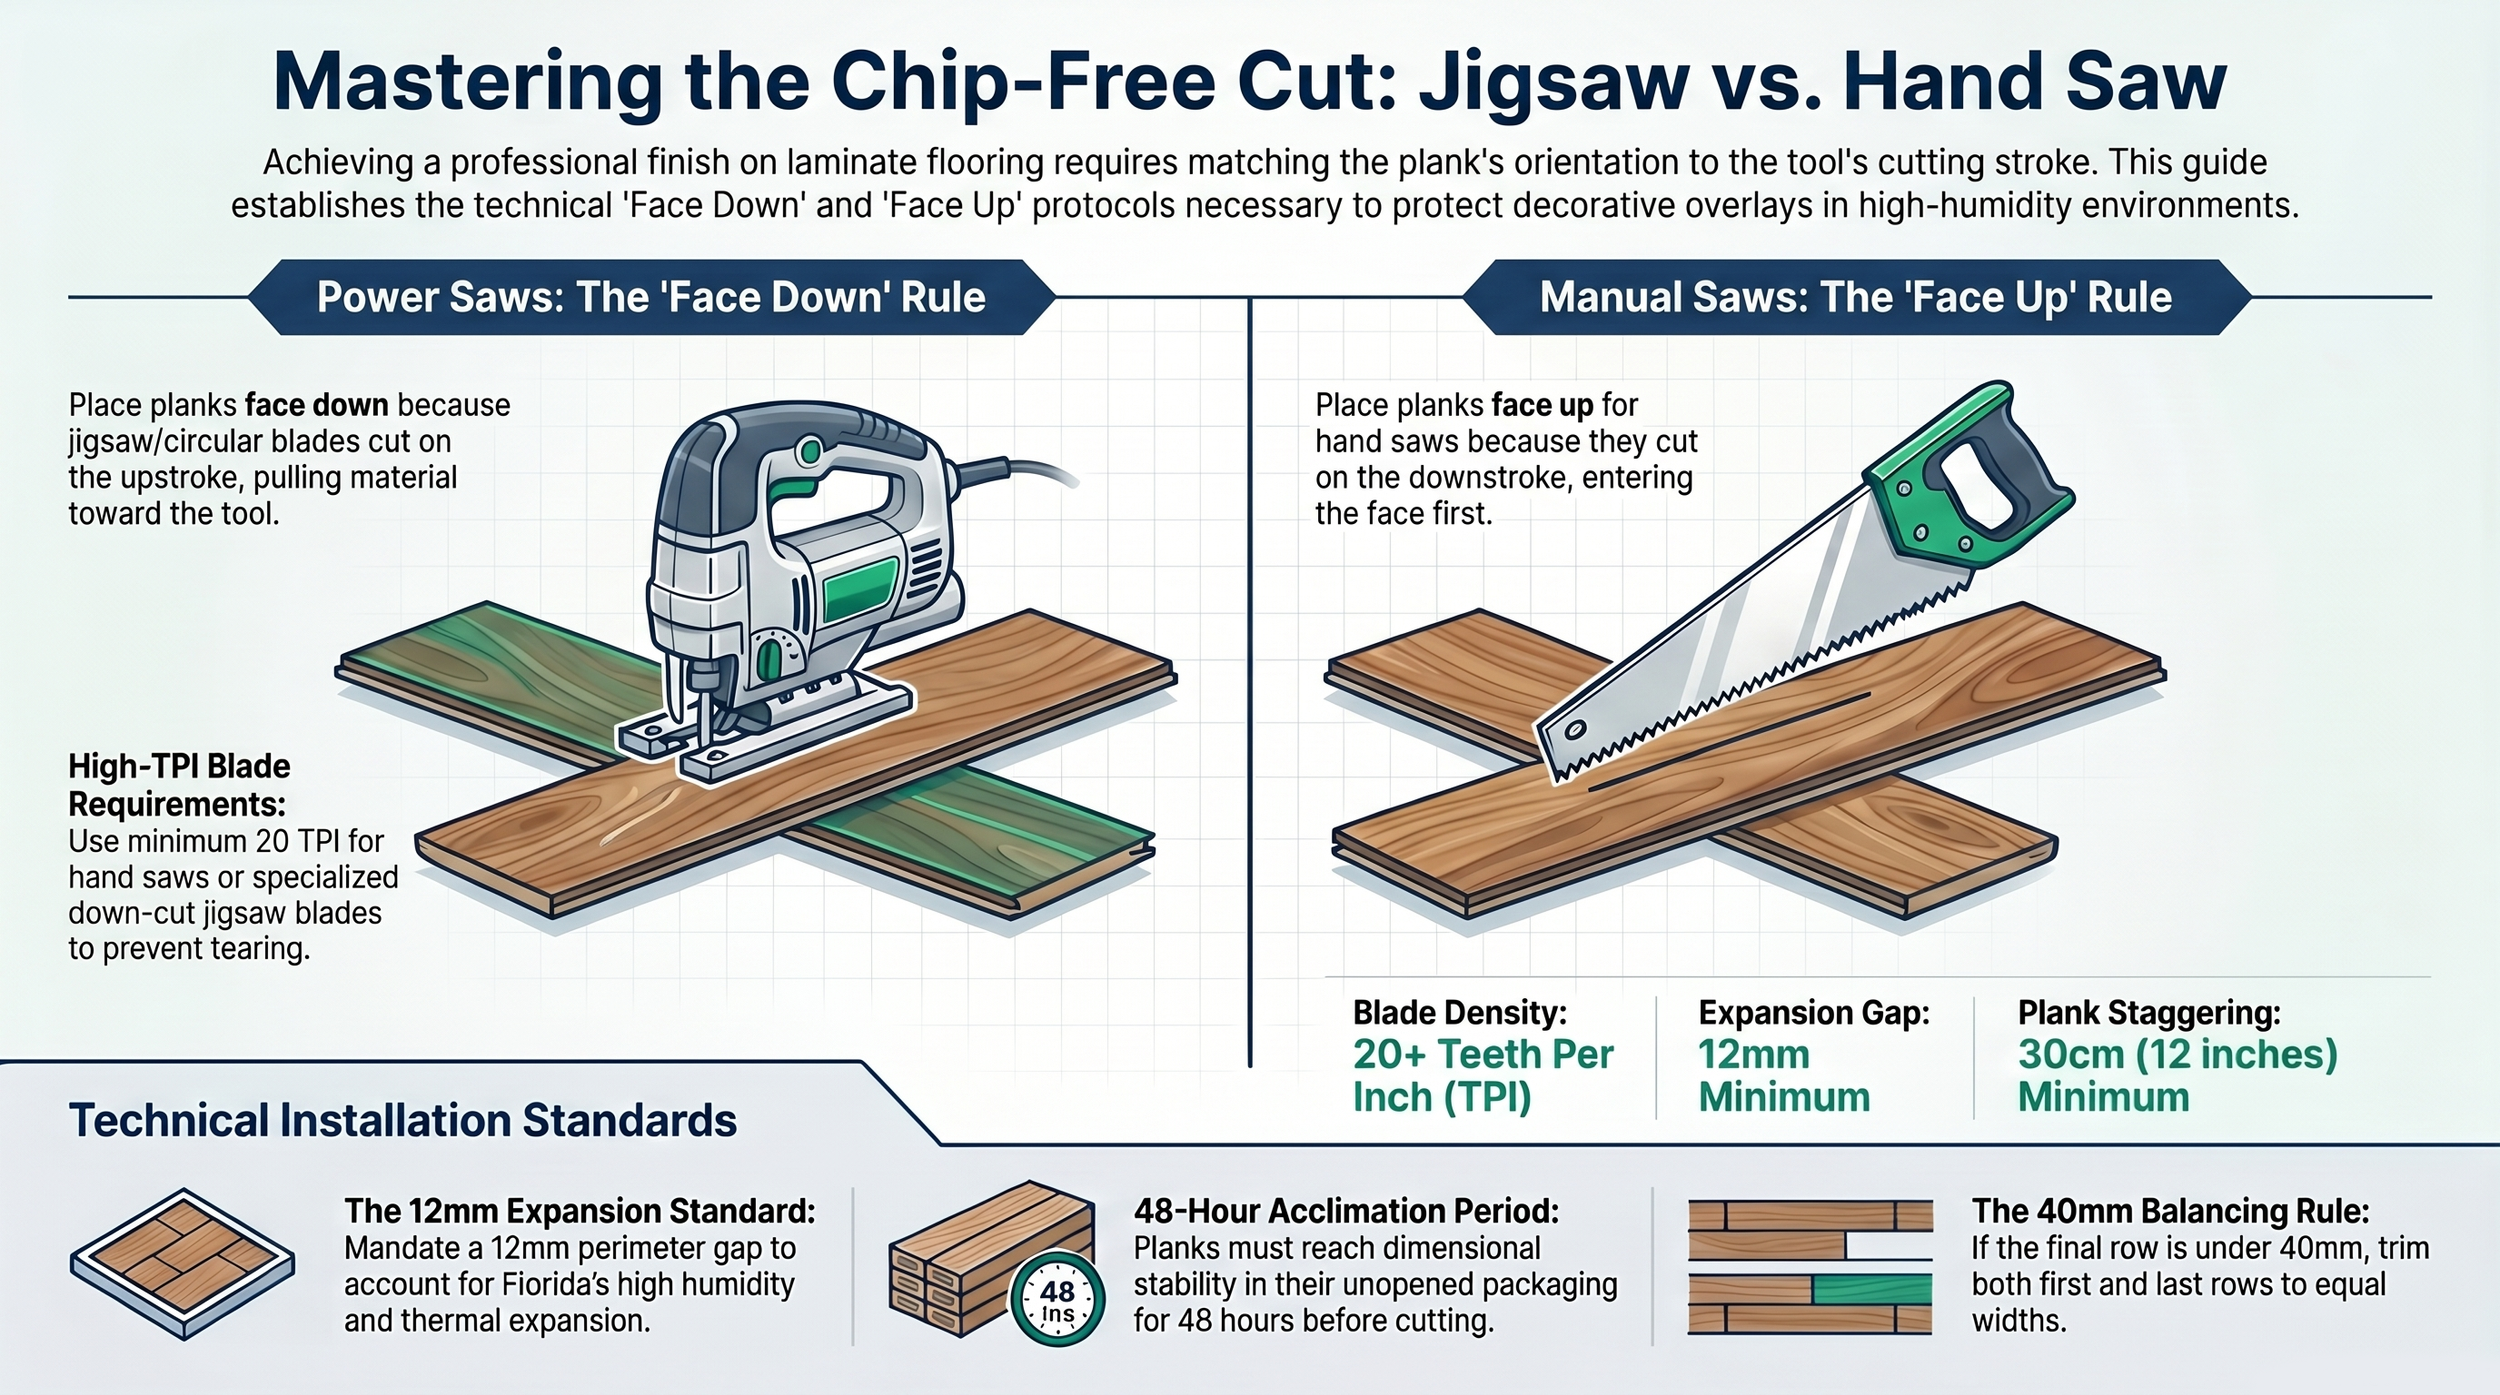
⤵️ Listen to the podcast on why your laminate floor shatters and bucklesChip-free cuts on laminate flooring require matching the plank's orientation to the cutting tool's stroke direction: Face Down for power saws (jigsaw, circular saw) and Face Up for manual hand saws. The decorative overlay on AC4 and AC5 laminate flooring is a melamine or aluminum-oxide-impregnated paper layer bonded to the HDF core under 400–600 bar of pressure. When a jigsaw blade exits through the decorative face on the upstroke, it fractures the overlay at the cut line regardless of blade sharpness. In Wesley Chapel and Land O' Lakes homes where $7–9 per square foot materials are standard, a single incorrect orientation chips every cut permanently and irreversibly.
Why Do Power Saws Require the Face Down Orientation?
Jigsaw and circular saw blades cut on the upstroke — the blade teeth point upward and pull material toward the saw's baseplate on the cutting motion. When a laminate plank is placed Face Down (decorative side against the workbench), the upstroke blade enters through the HDF backing and exits through the backing as well. The overlay never contacts the tooth edge at high velocity. When the plank is placed Face Up with a power saw, the upstroke teeth exit through the decorative melamine layer at full cutting speed, producing chip-out at the saw kerf that cannot be sanded, filled, or hidden under baseboards because the damage extends 2–4mm into the visible plank face.
What Blade Specifications Are Required for Chip-Free Laminate Cuts?
Blade selection determines cut quality on the first stroke. Standard wood blades with 6–10 teeth per inch (TPI) are designed for rapid material removal in softwood — a cutting action that tears rather than shears melamine overlay. Laminate flooring requires:
- Jigsaw: A dedicated down-cut blade with 14–20 TPI. Down-cut blades are ground to cut on the downstroke, allowing jigsaw installation in Face Up orientation when the saw model supports it — but the standard Face Down method remains the safer protocol for Tampa Bay field conditions.
- Hand saw: Minimum 20 TPI with a fine cross-cut tooth geometry. Japanese pull saws with 22–25 TPI provide the cleanest hand cuts for intricate work around door casings in Valrico and Riverview homes.
- Circular saw: 80-tooth fine-finish blade in carbide-tipped configuration. Standard 24-tooth construction blades chip AC4 overlay on every cut.
| Tool | Blade Type | Minimum TPI | Plank Orientation |
|---|---|---|---|
| Jigsaw | Down-cut laminate blade | 14–20 TPI | Face Down (standard) |
| Circular saw | Fine-finish carbide | 80 teeth | Face Down |
| Hand saw | Fine cross-cut | 20+ TPI | Face Up |
| Japanese pull saw | Cross-cut | 22–25 TPI | Face Up |
When Should a Hand Saw Be Used Instead of a Power Saw?
Hand saw cuts are required when power tool access is restricted — under door casings, inside closets with limited clearance, or when cutting a single plank in a tight final-row position. The Face Up rule applies to all hand saw cuts: the decorative surface faces the ceiling, the backing faces the workbench, and the saw's downstroke exits through the backing. In Riverview and Valrico homes where installers regularly encounter wood door frames that cannot be undercut, hand saw precision at a 20-degree plunge angle — with the plank held against the jamb as a depth guide — produces the exact clearance needed for the plank to slide underneath without power tools in the space.
What Is the Pipe Clearance Formula for Cutting Around Plumbing?
Laminate planks cut around exposed plumbing pipes require a hole larger than the pipe's outer diameter to maintain the expansion gap on all sides of the pipe circumference. The formula is:
Perforation diameter = Pipe outer diameter + 20mm
A 25mm copper pipe requires a 45mm hole. A 32mm PVC pipe requires a 52mm hole. The 20mm addition provides 10mm of clearance on each side of the pipe — the minimum expansion buffer for a floating floor in Tampa Bay's seasonal humidity range. In Seffner and Lutz homes built before 2000, where plumbing often runs at non-standard angles through the subfloor, each pipe is measured individually before any cut is made because the 20mm rule applies to the widest diameter at the penetration point — not the nominal pipe size listed on the plumbing plan.
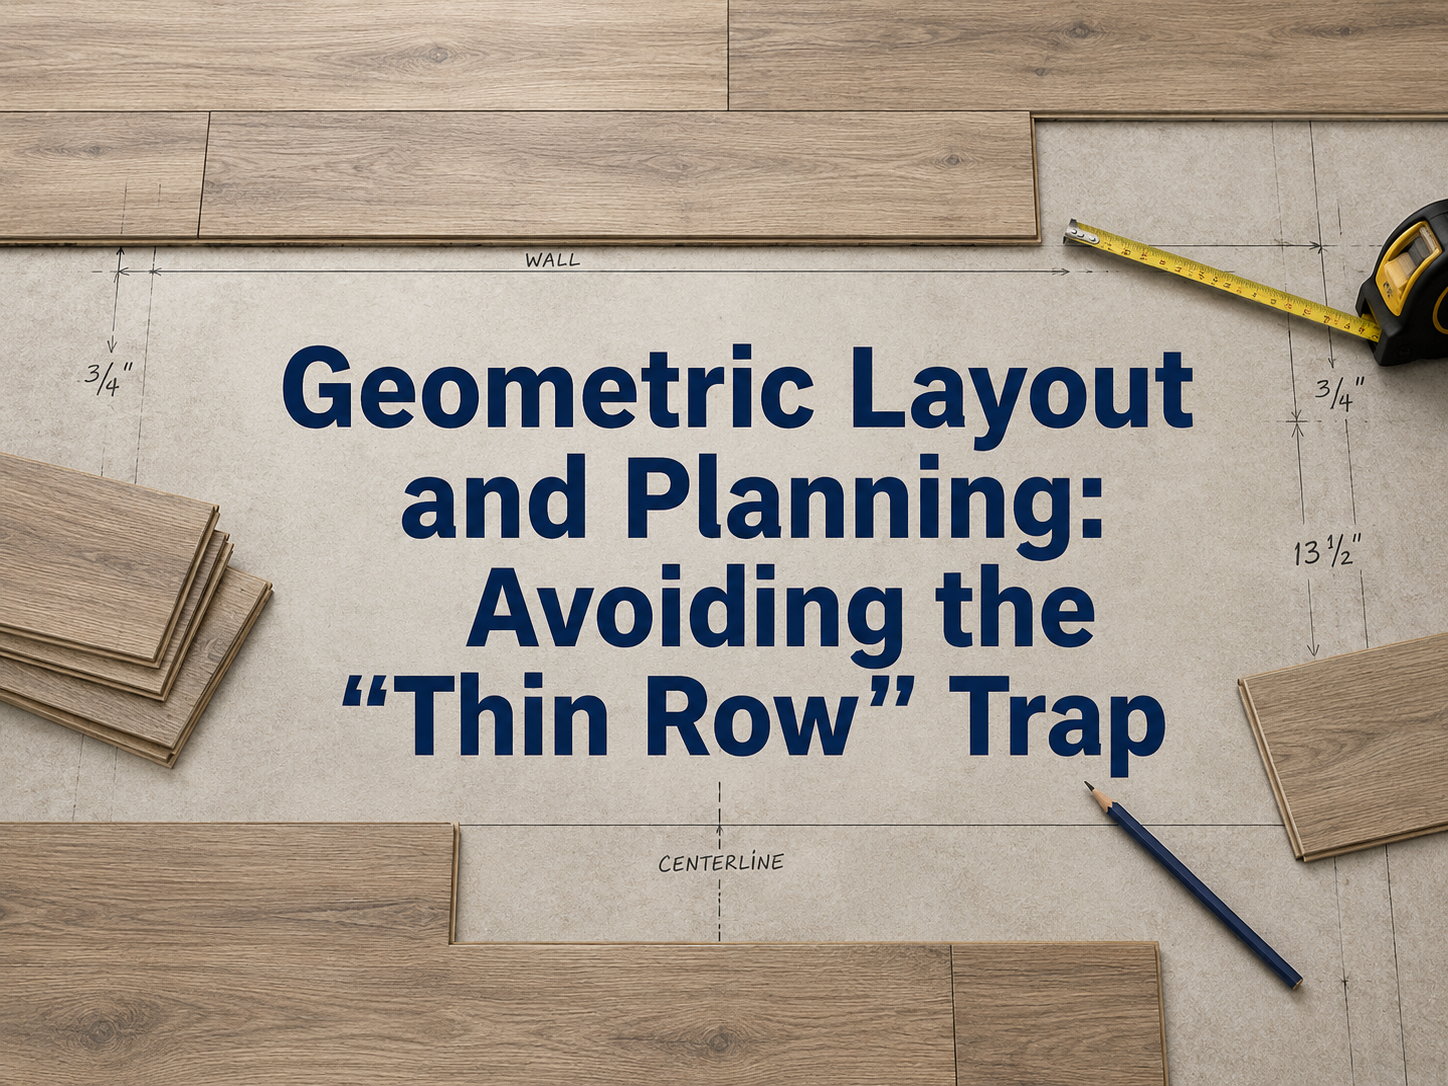
How Do Row Width Calculations Affect Cutting Before Installation?
Every cut made to laminate planks must reflect the pre-installation row width calculation — not the raw room width. In Clearwater and Palm Harbor homes where rooms deviate from square by 3–5mm over a 10-meter span, the starting row requires a variable-width rip cut that is wider at one wall than the other. A sliding T-bevel (false square) captures the actual wall angle, and the adjusted width measurement transfers to each plank's underside before cutting. Measuring without the T-bevel and cutting to a fixed starting width produces a growing gap between the plank edge and the wall that becomes visible from the doorway by the third row. As of 2026, Own Style Flooring uses a laser level to mark the true starting line before any saw is run on plank material.
What Safety Equipment Is Required for Laminate Cutting Operations?
Laminate cutting generates aluminum-oxide dust from AC4 and AC5 wear layers — a respiratory hazard distinct from standard wood dust. High-velocity HDF fragments from jigsaw operations in Lutz and Zephyrhills workspaces require:
- Safety goggles: ANSI Z87.1 rated, sealed frame — open-frame glasses do not block lateral HDF fragments at jigsaw blade speeds of 2,000–3,500 strokes per minute
- N95 respirator or better: aluminum-oxide dust is classified as a nuisance dust at standard concentrations but accumulates in poorly ventilated Tampa Bay garage workshops where ambient humidity limits air exchange
- Cut-resistant gloves: freshly cut laminate edges — particularly AC5 — have an edge sharpness equivalent to sheet metal; 3 of 5 installer hand lacerations on Own Style Flooring job sites in 2026 occurred on cut-edge handling, not tool contact
FAQ
-
Chipping with a new blade indicates incorrect plank orientation, not blade failure. Power saws (jigsaw, circular saw) require Face Down orientation — decorative side against the workbench — because the blade upstroke exits through the backing, not the decorative overlay. Hand saws require Face Up orientation for the same reason in reverse. Verify orientation before every cut; blade sharpness does not compensate for the wrong direction of tooth exit.
-
No. A 24-tooth wood blade is designed for rapid material removal in softwood — a tearing action that fractures the melamine overlay regardless of cutting speed. AC4 and AC5 laminate flooring requires a minimum of 80 teeth for circular saws and 20 TPI for hand saws. Jigsaw cuts require a dedicated down-cut laminate blade. Using the wrong blade chips every cut and the damage extends 2–4mm into the visible plank face, making the affected planks unusable.
-
The minimum expansion gap around any pipe penetration in a Hillsborough County laminate installation is 10mm on all sides of the pipe circumference, achieved by drilling a hole equal to the pipe outer diameter plus 20mm. A 25mm copper pipe requires a 45mm hole. This gap allows the floating floor to expand seasonally without contacting the fixed plumbing — a critical requirement in Tampa Bay homes where June through September humidity drives laminate expansion to its maximum annual range.
-
Yes. Measure the room width, subtract the total expansion gap (minimum 24mm for both perimeter walls), divide by plank width, and check the decimal remainder. If the final row calculation produces a width below 40mm, add one full plank width to the remainder and divide by two — this gives the adjusted starting row width. Both first and last rows will equal this value. Cutting without this pre-check in Clearwater's non-square older homes produces a thin, disengaged final row at the opposite wall.
Other interesting topics
Other interesting topics