Pull Bars and Tapping Blocks: Why the Right Tool Protects Your Laminate Floor in Tampa Bay
⤵️ Listen to the podcast on why scrap wood destroys laminate floorsPull bars and tapping blocks are precision instruments engineered to transmit installation force to the laminate locking profile without damaging the HDF core — and neither tool is interchangeable with its improvised substitute. A tapping block must match the specific locking profile of the floor being installed: a standard tongue-and-groove block shears the more complex geometry of a Uniclic or Valinge joint. In Land O' Lakes and Zephyrhills installations, where planks reach maximum dimensional expansion after 48–72 hours of acclimatization, the margin between a properly seated joint and a cracked locking tongue is determined by impact geometry and mallet elasticity — not by force applied.
Why Does the HDF Locking Profile Fracture Under Direct Impact?
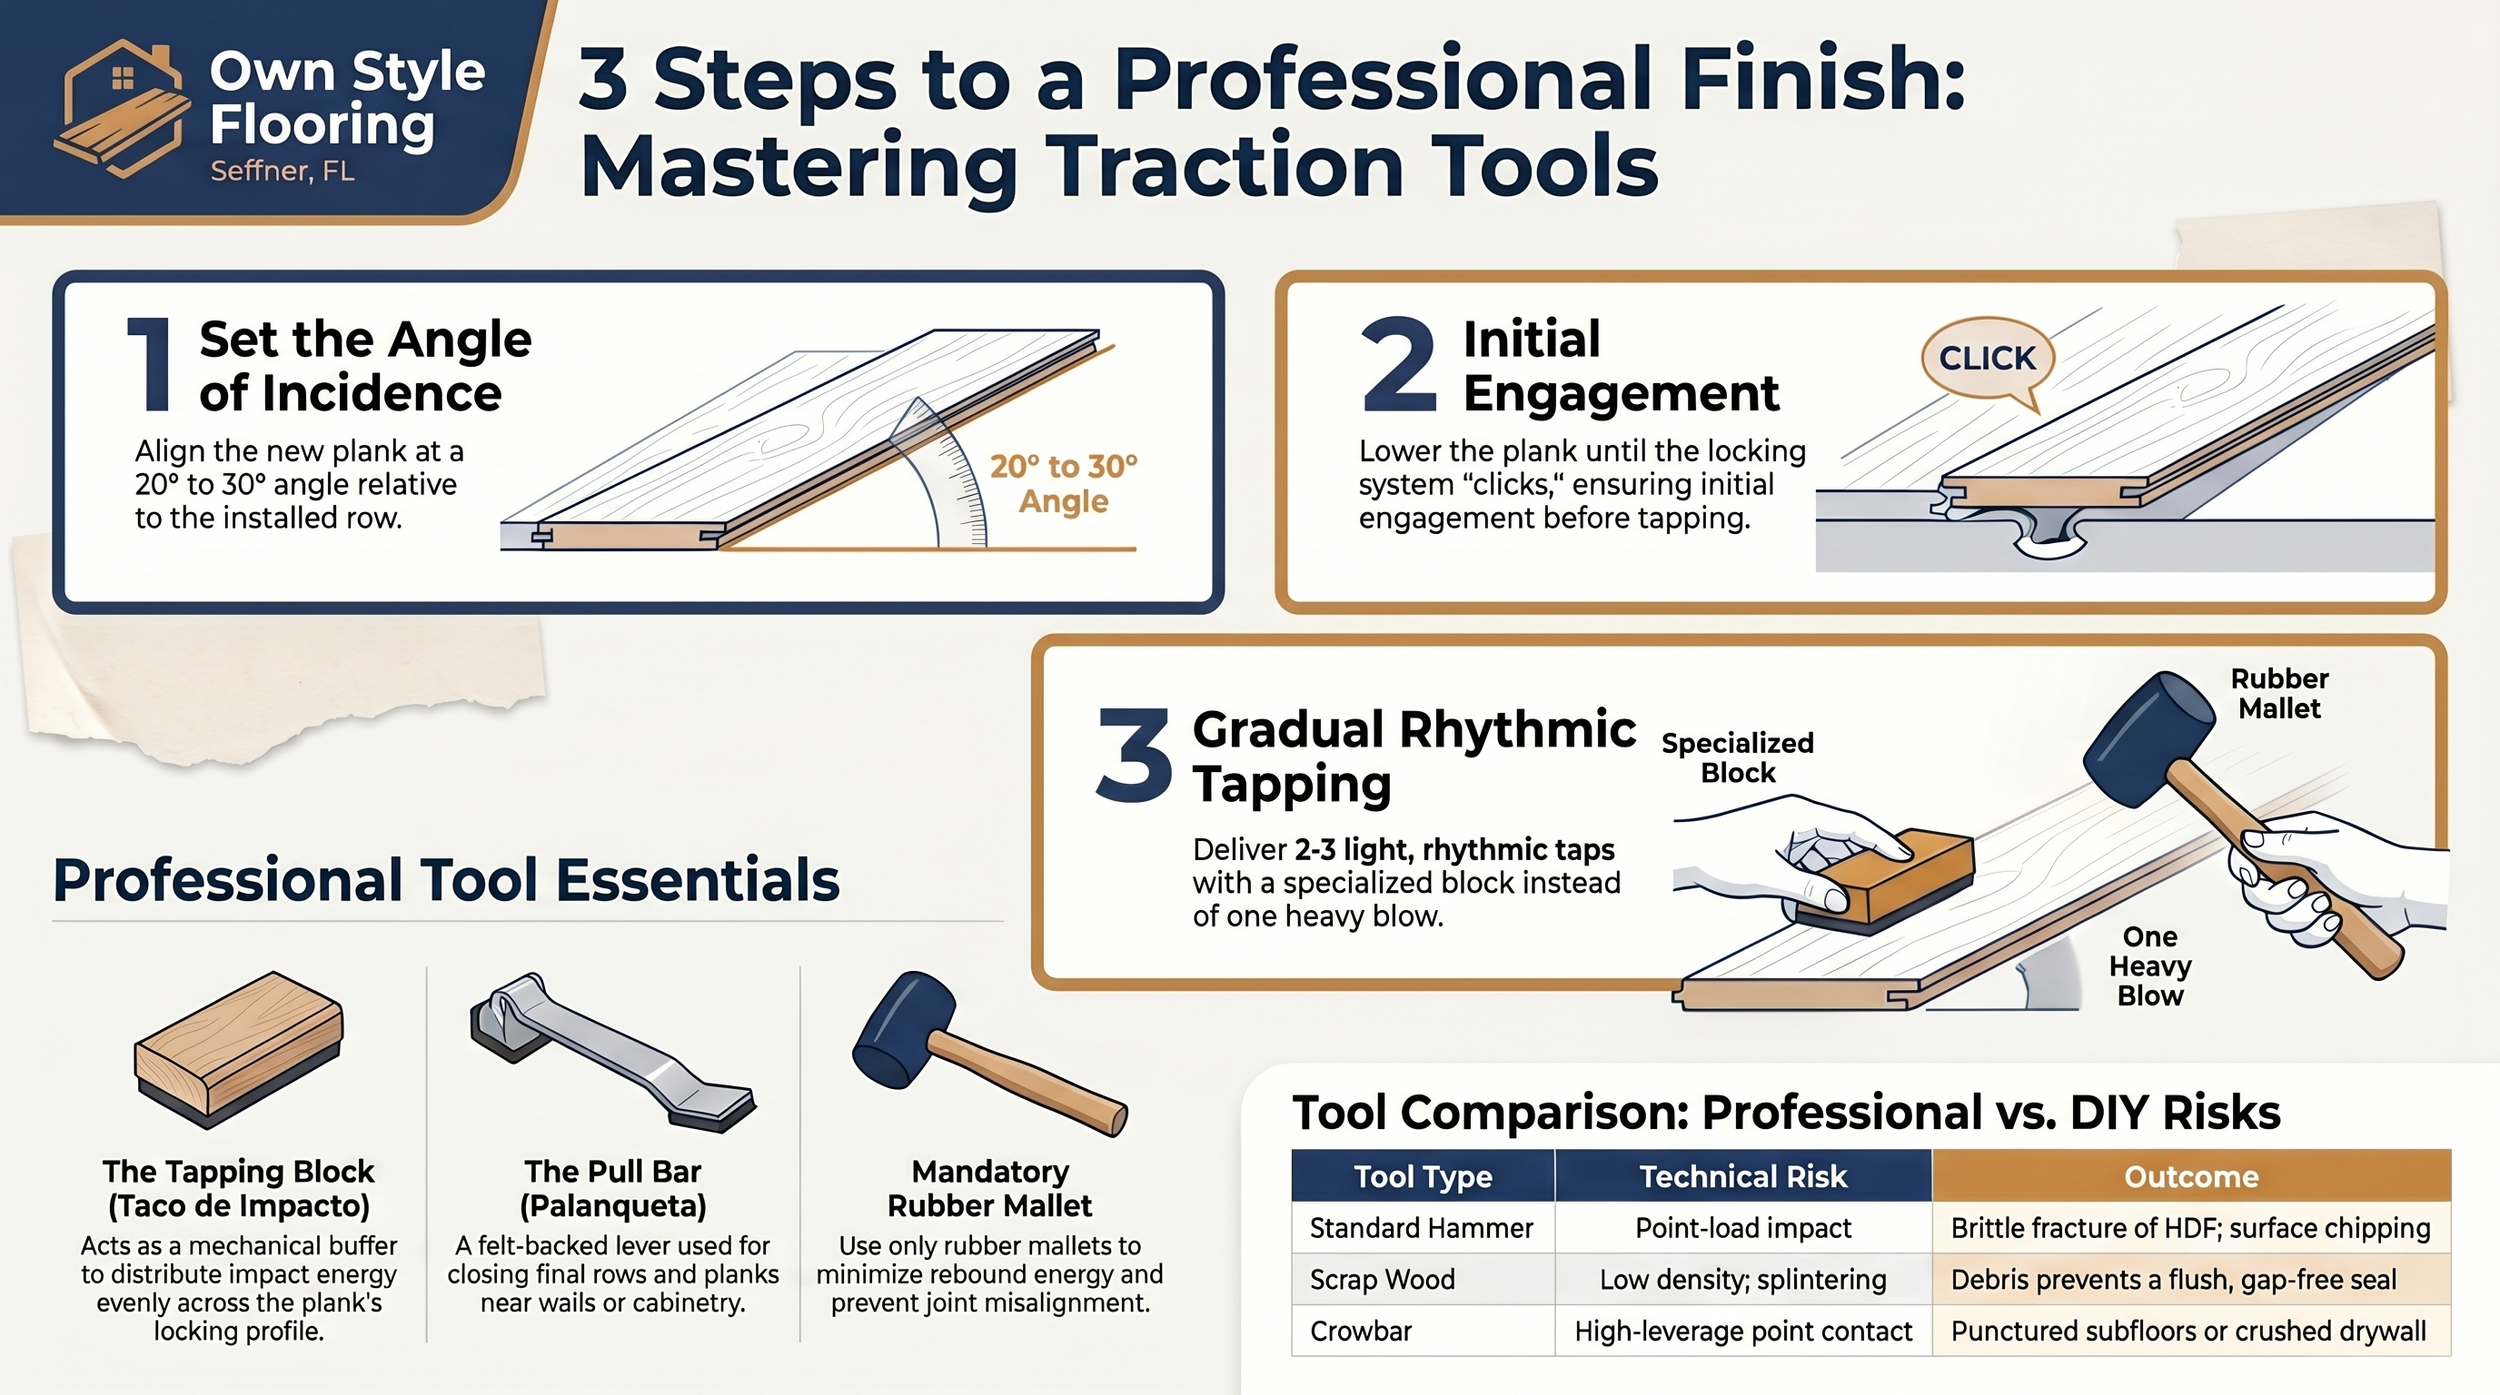
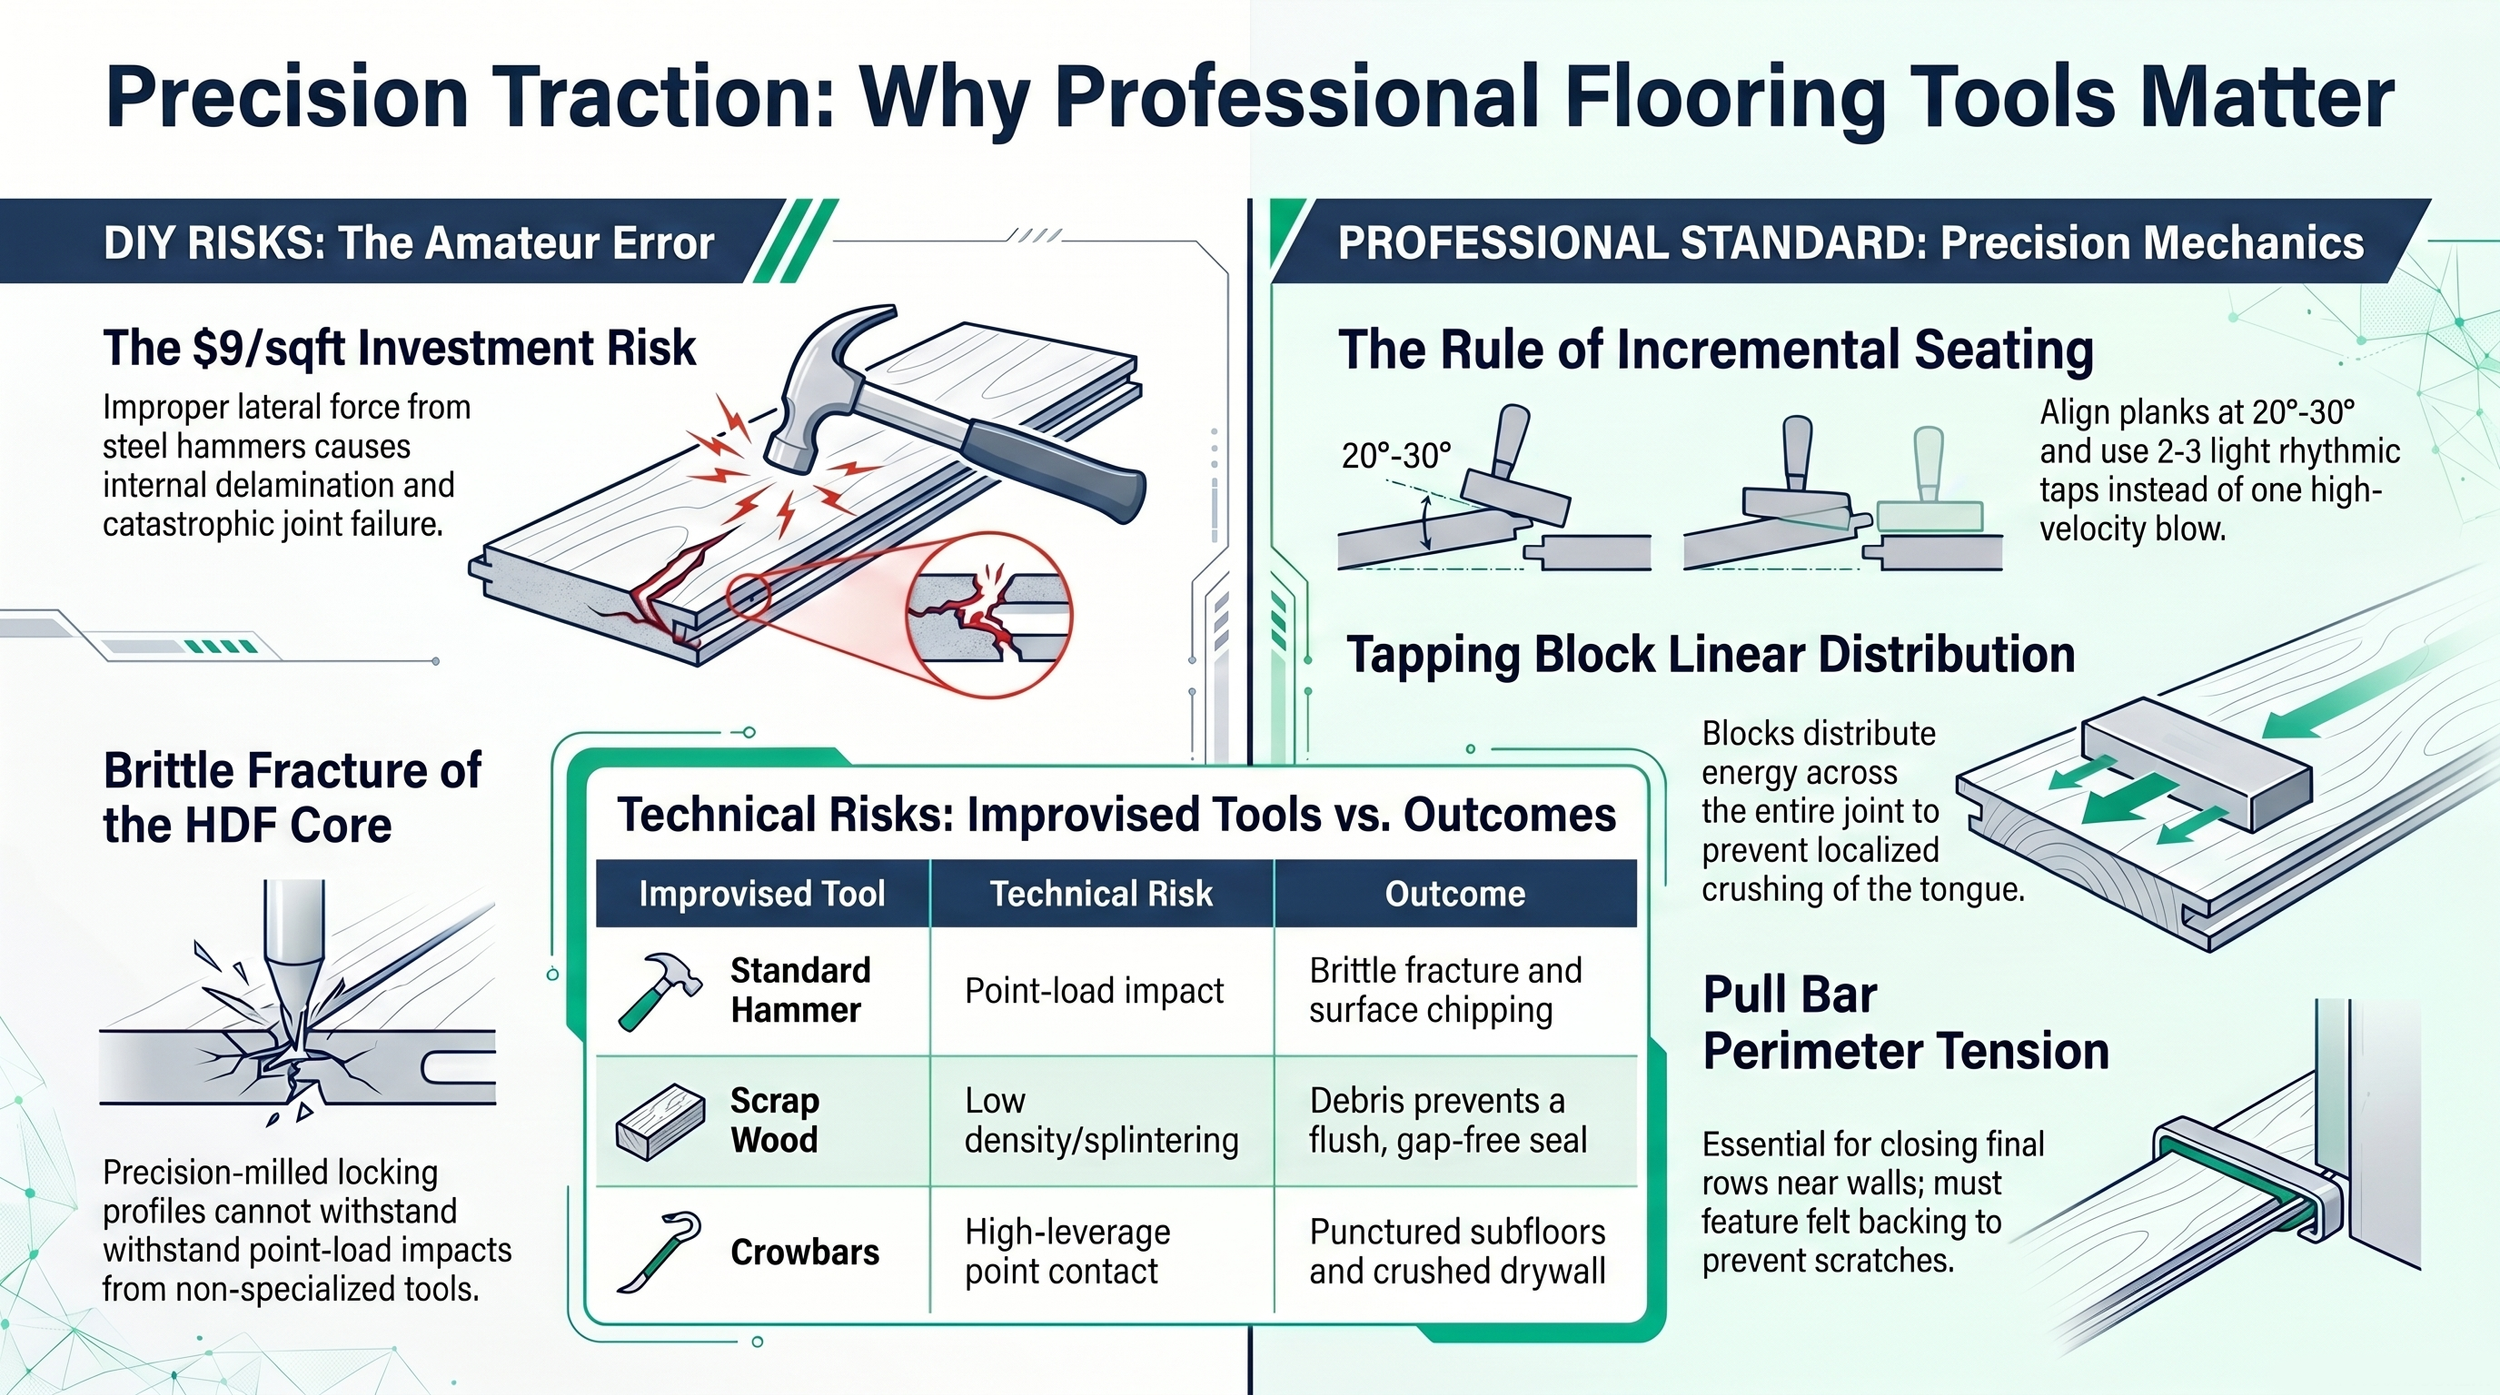
The HDF locking tongue in a laminate click-lock system is a precision-milled fiber composite with a fracture threshold of approximately 15–20 N/mm² under lateral shear. A standard steel hammer delivers an impact pulse of 50–80 N/mm² at the contact point — 3–5 times the tongue's fracture limit. Even a single blow without a tapping block causes internal delamination of the HDF fiber layers at the tongue base, a failure invisible from the surface that eliminates the joint's clamping force within 2–4 weeks of foot traffic. As of 2026, this is the most documented cause of early laminate failure on DIY projects across Hillsborough County and Pasco County installations in the $5–9 per square foot range.
What Is the Correct Tapping Block Material and Why Does It Matter?
A professional tapping block for Uniclic-compatible flooring is machined from high-density nylon or UHMW polyethylene. Both materials distribute impact force across the full contact surface while their molecular structure absorbs the rebound energy component of each mallet strike. Wood blocks — whether finished lumber or raw scrap — fail under repeated impact at two mechanisms: fiber compression at the contact face creates uneven load distribution after 20–30 strikes, and micro-splinters from the impact surface lodge inside the locking channel, preventing the tongue from reaching full engagement depth. A 0.3mm splinter in the Uniclic channel creates a 0.3mm gap at the visible face of the joint — 3 times the maximum acceptable gap in a professional installation.
How Does a Pull Bar Work and When Is It Required?
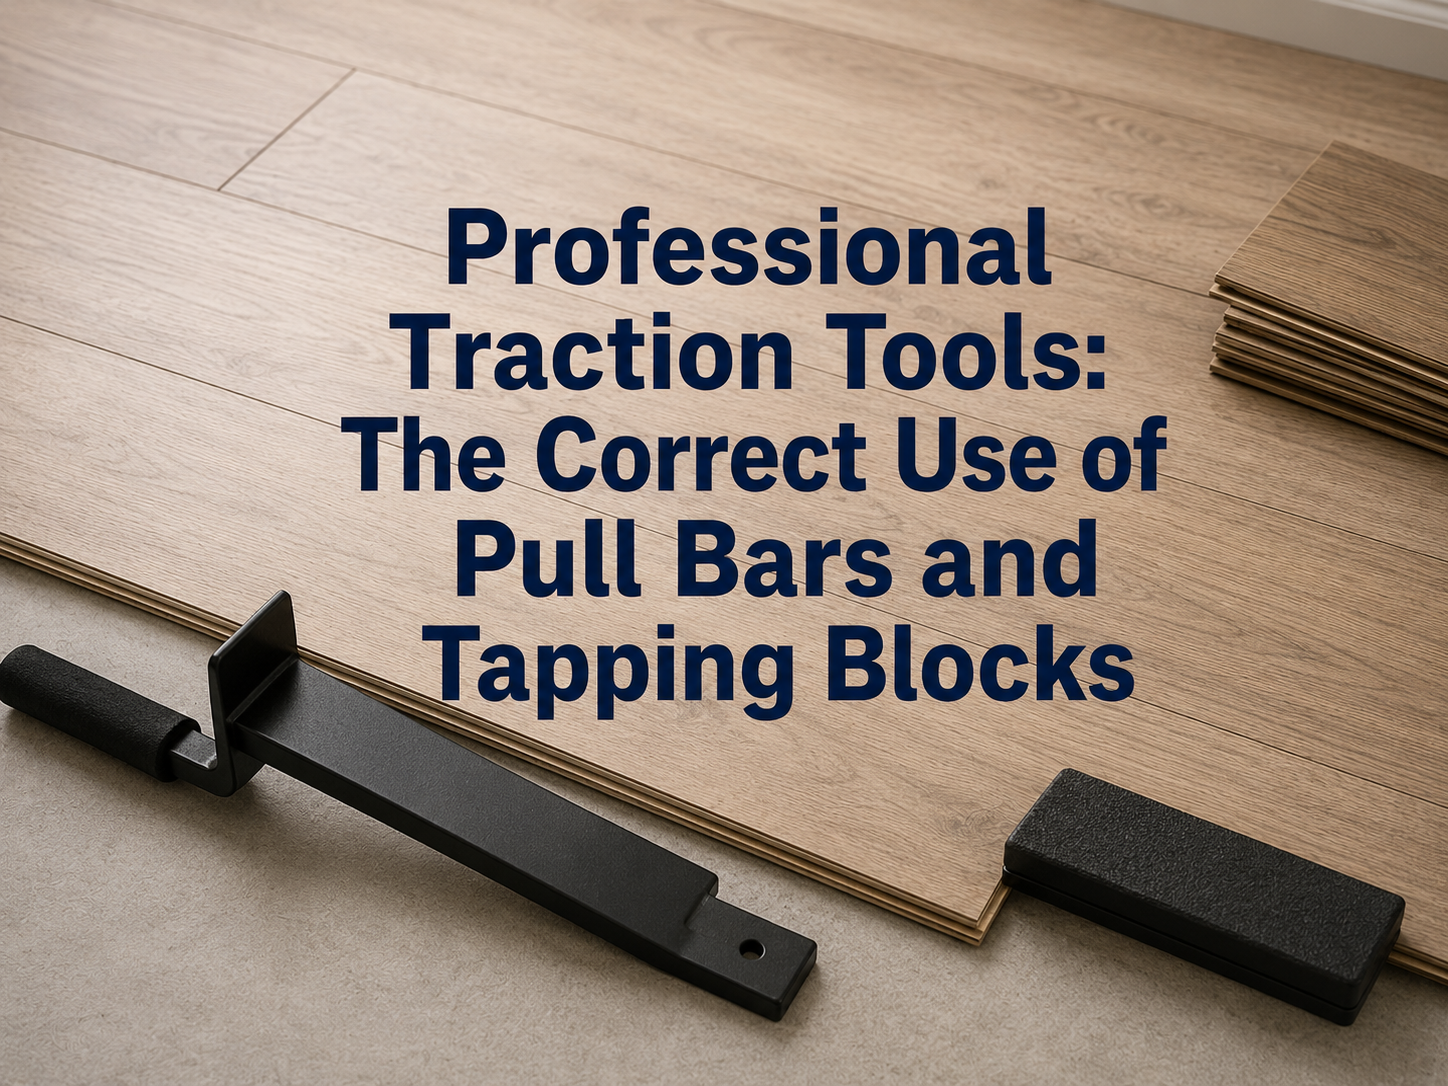
A pull bar is a lever-action tool with a thin angled hook at one end and a raised impact stop at the other. The hook engages the exposed groove edge of the last plank in a row, and rubber mallet strikes on the impact stop translate into horizontal pulling force that seats the plank against the previous row without requiring access space for a tapping block. Pull bar use is mandatory for every plank placed against a fixed wall, under cabinetry, or at door threshold approaches — situations that occur on every residential installation in Wesley Chapel and New Tampa. The critical specification for a professional pull bar is a felt or foam backing on the hook face: direct metal contact on a $7–9/sqft wear layer leaves permanent burnish marks within 3–5 strokes.
What Is the Correct Pull Bar Sequence for Final Row Placement?
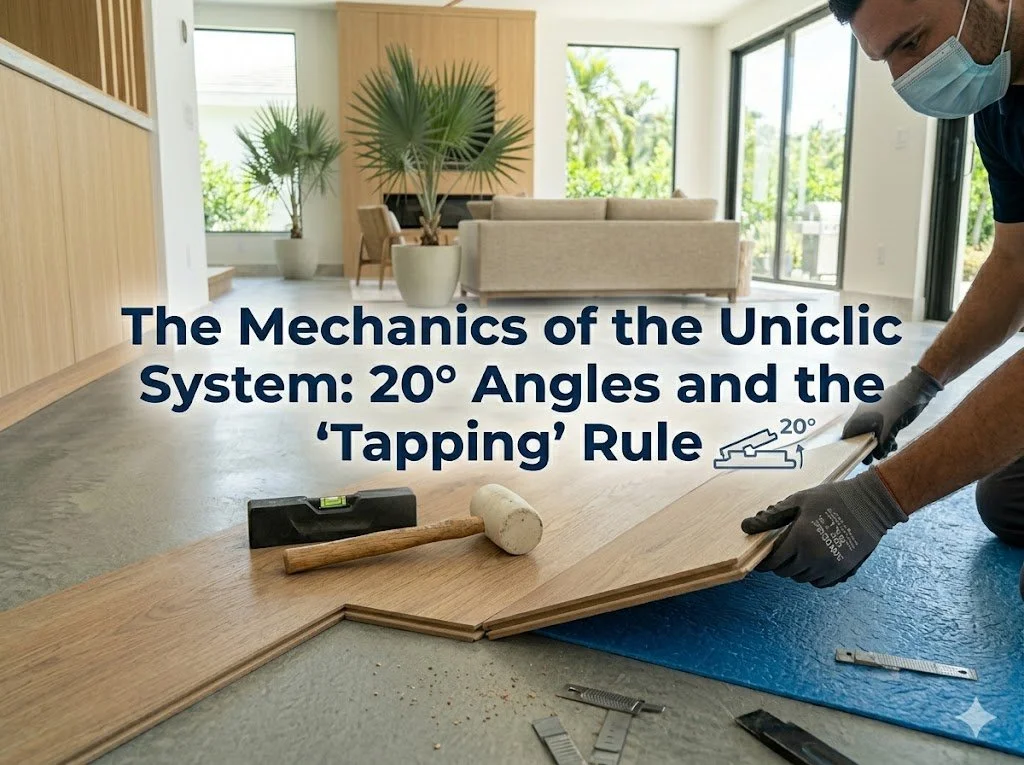
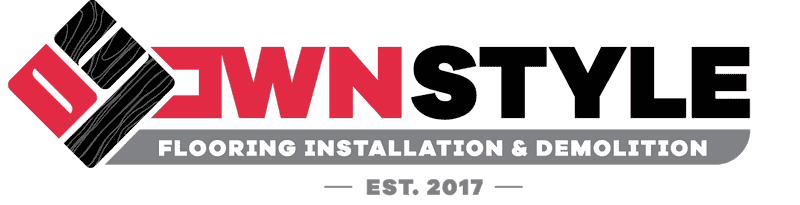
The correct final-row sequence uses the pull bar in combination with the 20–30 degree initial engagement before the planks make full contact with the wall:
- Hold the final plank at 20 degrees (Method A) and lower until the long-side profile begins to engage — approximately 30–40% of full lock depth
- Lower the plank flat to the subfloor with the remaining gap still visible
- Hook the pull bar on the exposed groove edge
- Deliver 2–3 gradual mallet strikes to advance the plank to full lock depth
- Verify the perimeter expansion gap is maintained with a 12mm spacer before proceeding to the next plank
Attempting to drive the final row flat from the start — without the initial 20-degree engagement — forces the tongue directly against the groove wall rather than into the channel, requiring double the pull force and compressing the expansion gap below the 12mm minimum in the process.
What Improvised Tools Cause the Most Damage in Tampa Bay Installations?
| Improvised Tool | Failure Mechanism | Result |
|---|---|---|
| Steel hammer (direct) | Point-load exceeds HDF fracture threshold | Invisible internal tongue delamination |
| Scrap wood block | Fiber compression + micro-splinters in joint | Permanent gap at joint face |
| Crowbar or pry tool | High leverage point contact, no flat surface | Subfloor gouging, plank edge crushing |
| Rubber floor mallet (direct) | Insufficient force distribution without block | Surface chipping on decorative overlay |
In Pasco County and Hillsborough County homes where Own Style Flooring replaces DIY-installed floors, the pull bar and tapping block are the two most frequently missing tools on site. Their combined cost of $25–35 eliminates the most preventable failure mode in laminate installation.
How Do Traction Tools Maintain Expansion Gaps During Installation?
The pull bar provides a critical secondary function beyond plank seating: it allows the installer to apply tension to the final row against the perimeter spacers without shifting the entire floor toward the working wall. When a floor of 20 or more rows is pulled toward the wall for final-row seating, the collective friction between the underlayment and all installed planks can compress the expansion gap on the opposite wall below the 12mm minimum — a problem that Own Style Flooring addresses with floor anchors during large-format installations in New Tampa open-plan homes exceeding 50 square meters. For standard-size rooms in Lutz and Land O' Lakes, the pull bar's gradual seating sequence (3 taps maximum per plank) prevents gap compression by keeping each final-row plank's travel distance under 5mm per tap cycle.
FAQ
-
No. Wood blocks compress and splinter under repeated impact, releasing micro-fragments that lodge inside the Uniclic locking channel. A 0.3mm wood splinter prevents full tongue engagement, creating a permanent visible gap at the joint face. Nylon tapping blocks maintain consistent contact surface geometry across hundreds of installation strikes and do not generate debris. The $15 cost difference between scrap wood and a professional nylon block is the difference between a sealed joint and a permanent gap.
-
Pull bar separation is almost always a subfloor issue, not a tool failure. The pull bar closes the gap correctly, but the subfloor beneath the joint has a deviation exceeding 2mm over 1 meter — creating a lever arm that opens the joint again under the first footfall. Professionals in Hillsborough County verify subfloor planimetry with a 1.8-meter aluminum straightedge before installation. If the floor separates after correct pull bar use, the subfloor requires leveling compound before the floor can be reinstalled.
-
Yes. Regardless of room size, a pull bar is required for every plank placed against a fixed wall, under door casings, or at any position where the tapping block cannot reach the exposed groove edge. Large rooms in Land O' Lakes and Wesley Chapel require pull bar use for the entire perimeter final row — typically 15–25 planks per installation. The pull bar also maintains the 12mm perimeter expansion gap during final-row placement, which a tapping block used at a wall cannot verify simultaneously.
-
A direct steel hammer blow delivers 50–80 N/mm² of point-load impact to the HDF locking tongue — 3–5 times the tongue's fracture threshold. The internal fiber delamination is not visible on the surface or in the joint face immediately after the strike. The damage becomes audible within 2–4 weeks of foot traffic as the fractured tongue micro-moves with each step, producing a creaking or clicking sound that indicates the joint has lost its clamping force. Row replacement is the only repair option at that point.
Other interesting topics
Other interesting topics