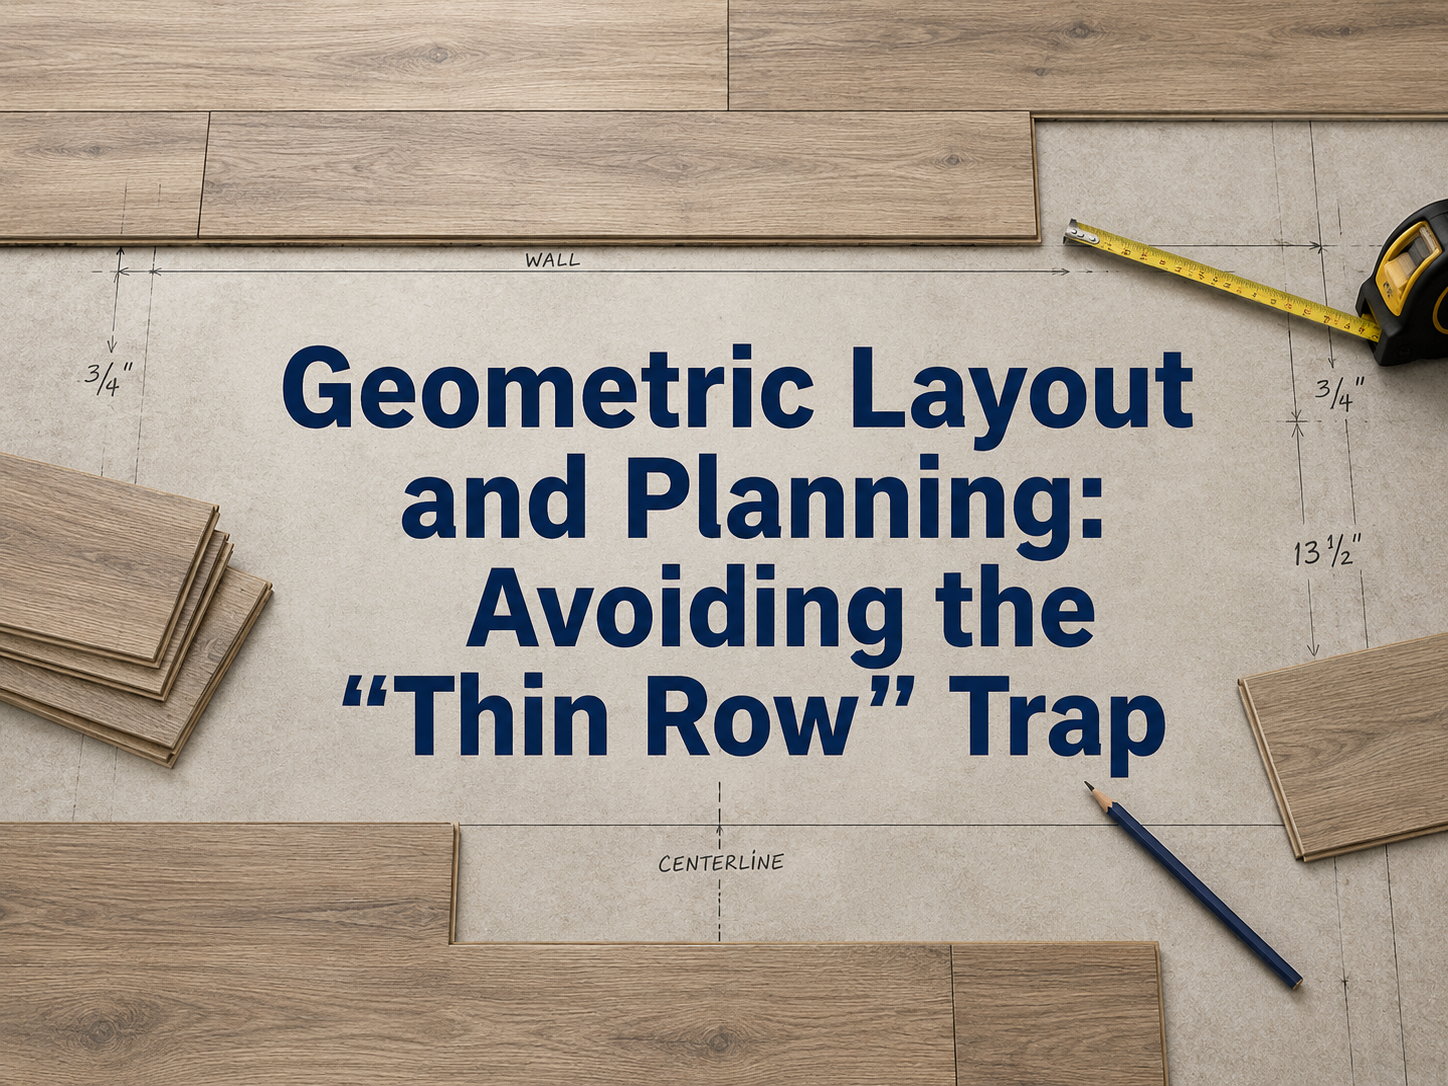
How to Calculate Flooring Row Widths and Avoid the Thin Row Trap in Tampa Bay Homes
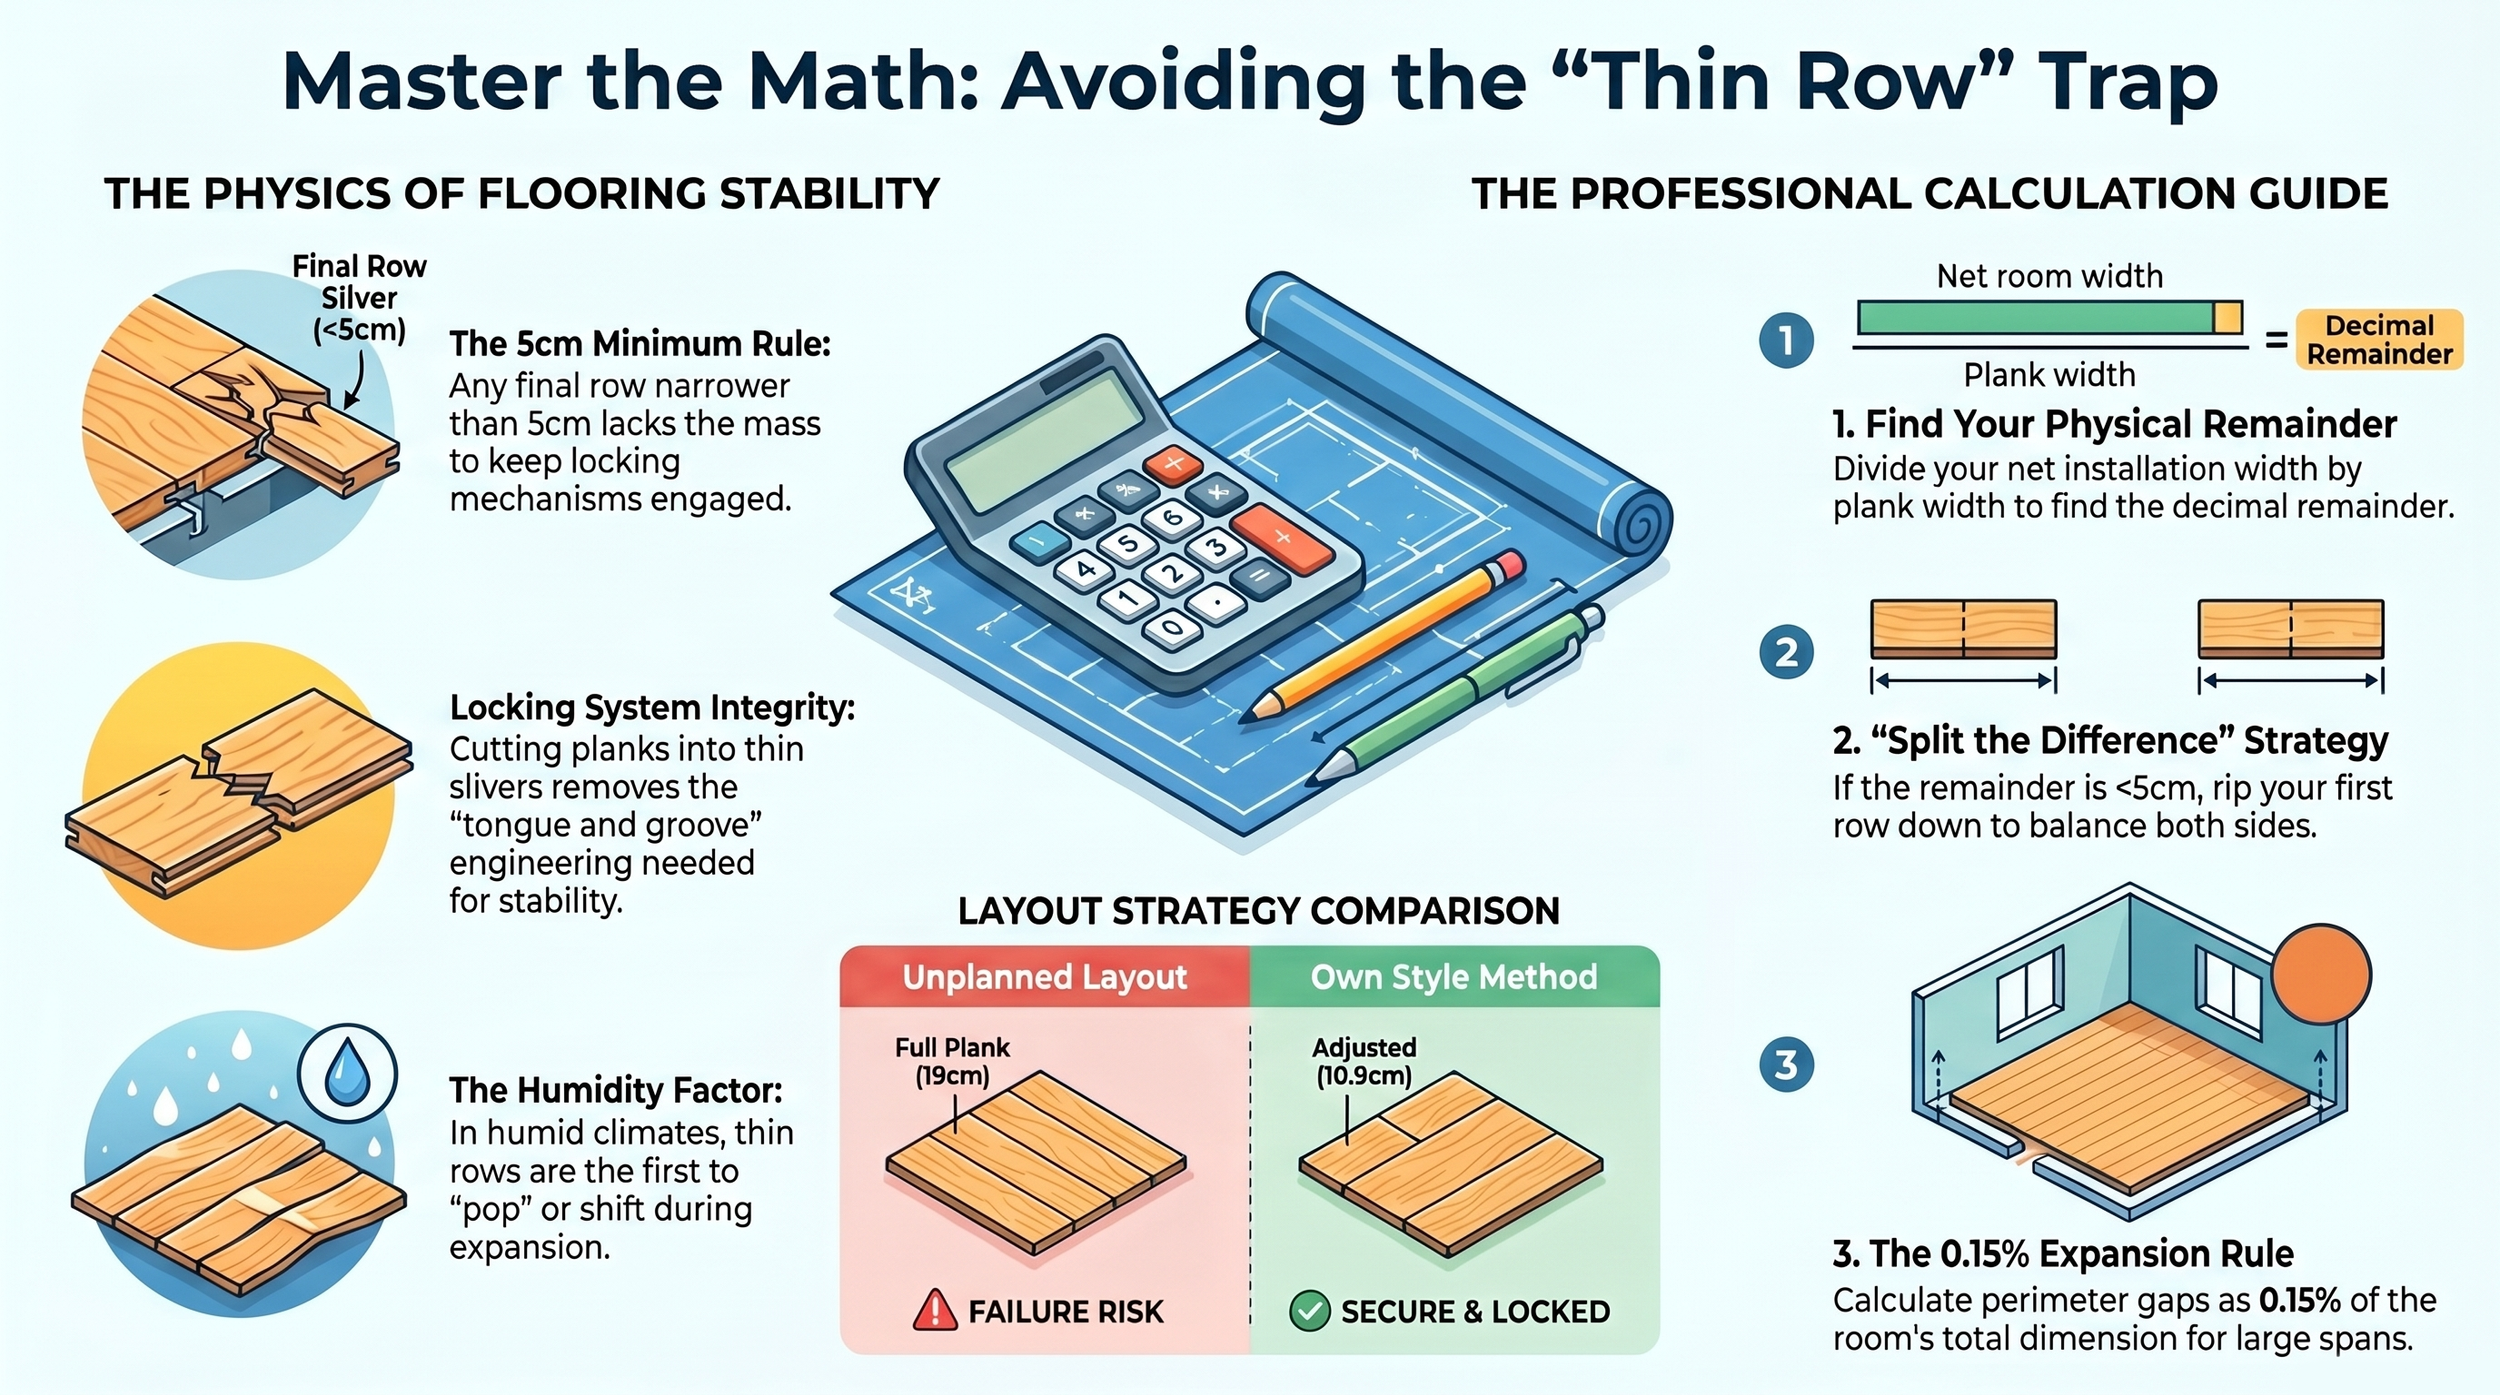
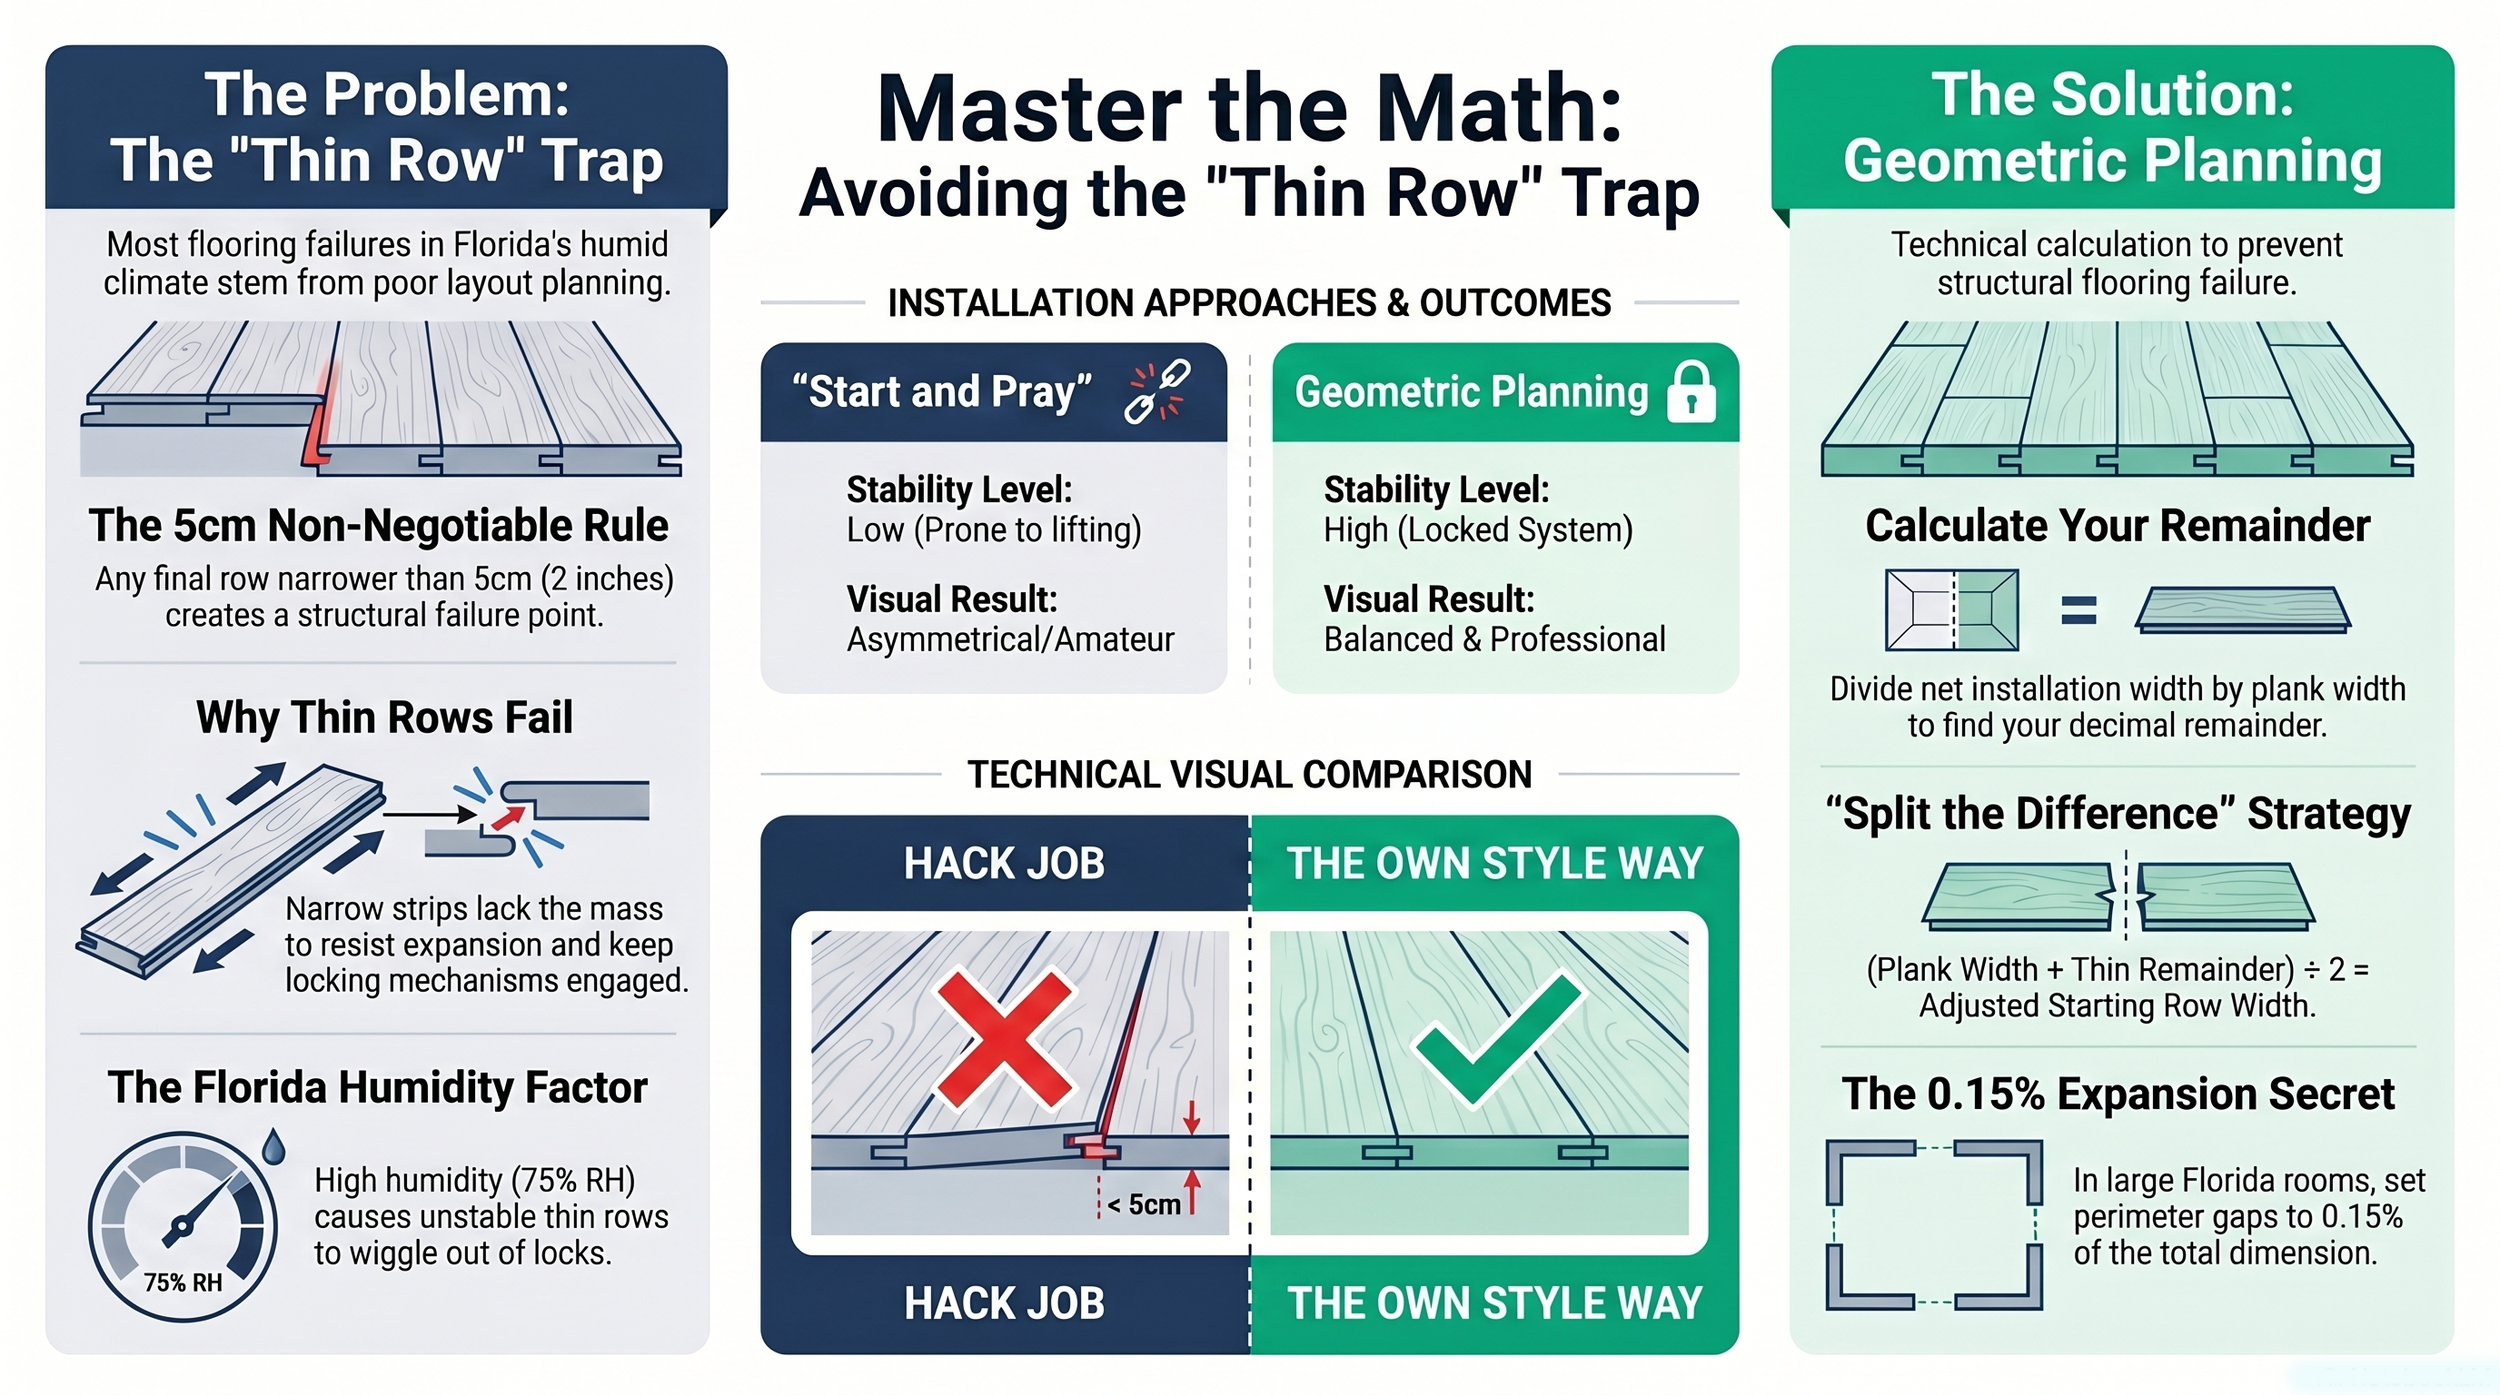
⤵️ Listen to the podcast on the hidden geometry of durable flooringGeometric planning determines whether a laminate floor remains structurally stable for 20 years or fails at the perimeter within the first Florida summer. A final row narrower than 5cm (approximately 2 inches) lacks the surface area and mass to keep the locking mechanism engaged under foot traffic — creating a failure point that cannot be repaired without removing and recalculating the entire floor. In Largo and Clearwater homes, where $5–9 per square foot installations are common, this single miscalculation during layout planning produces buckled perimeter rows and disengaged click joints within 6–12 months of installation.
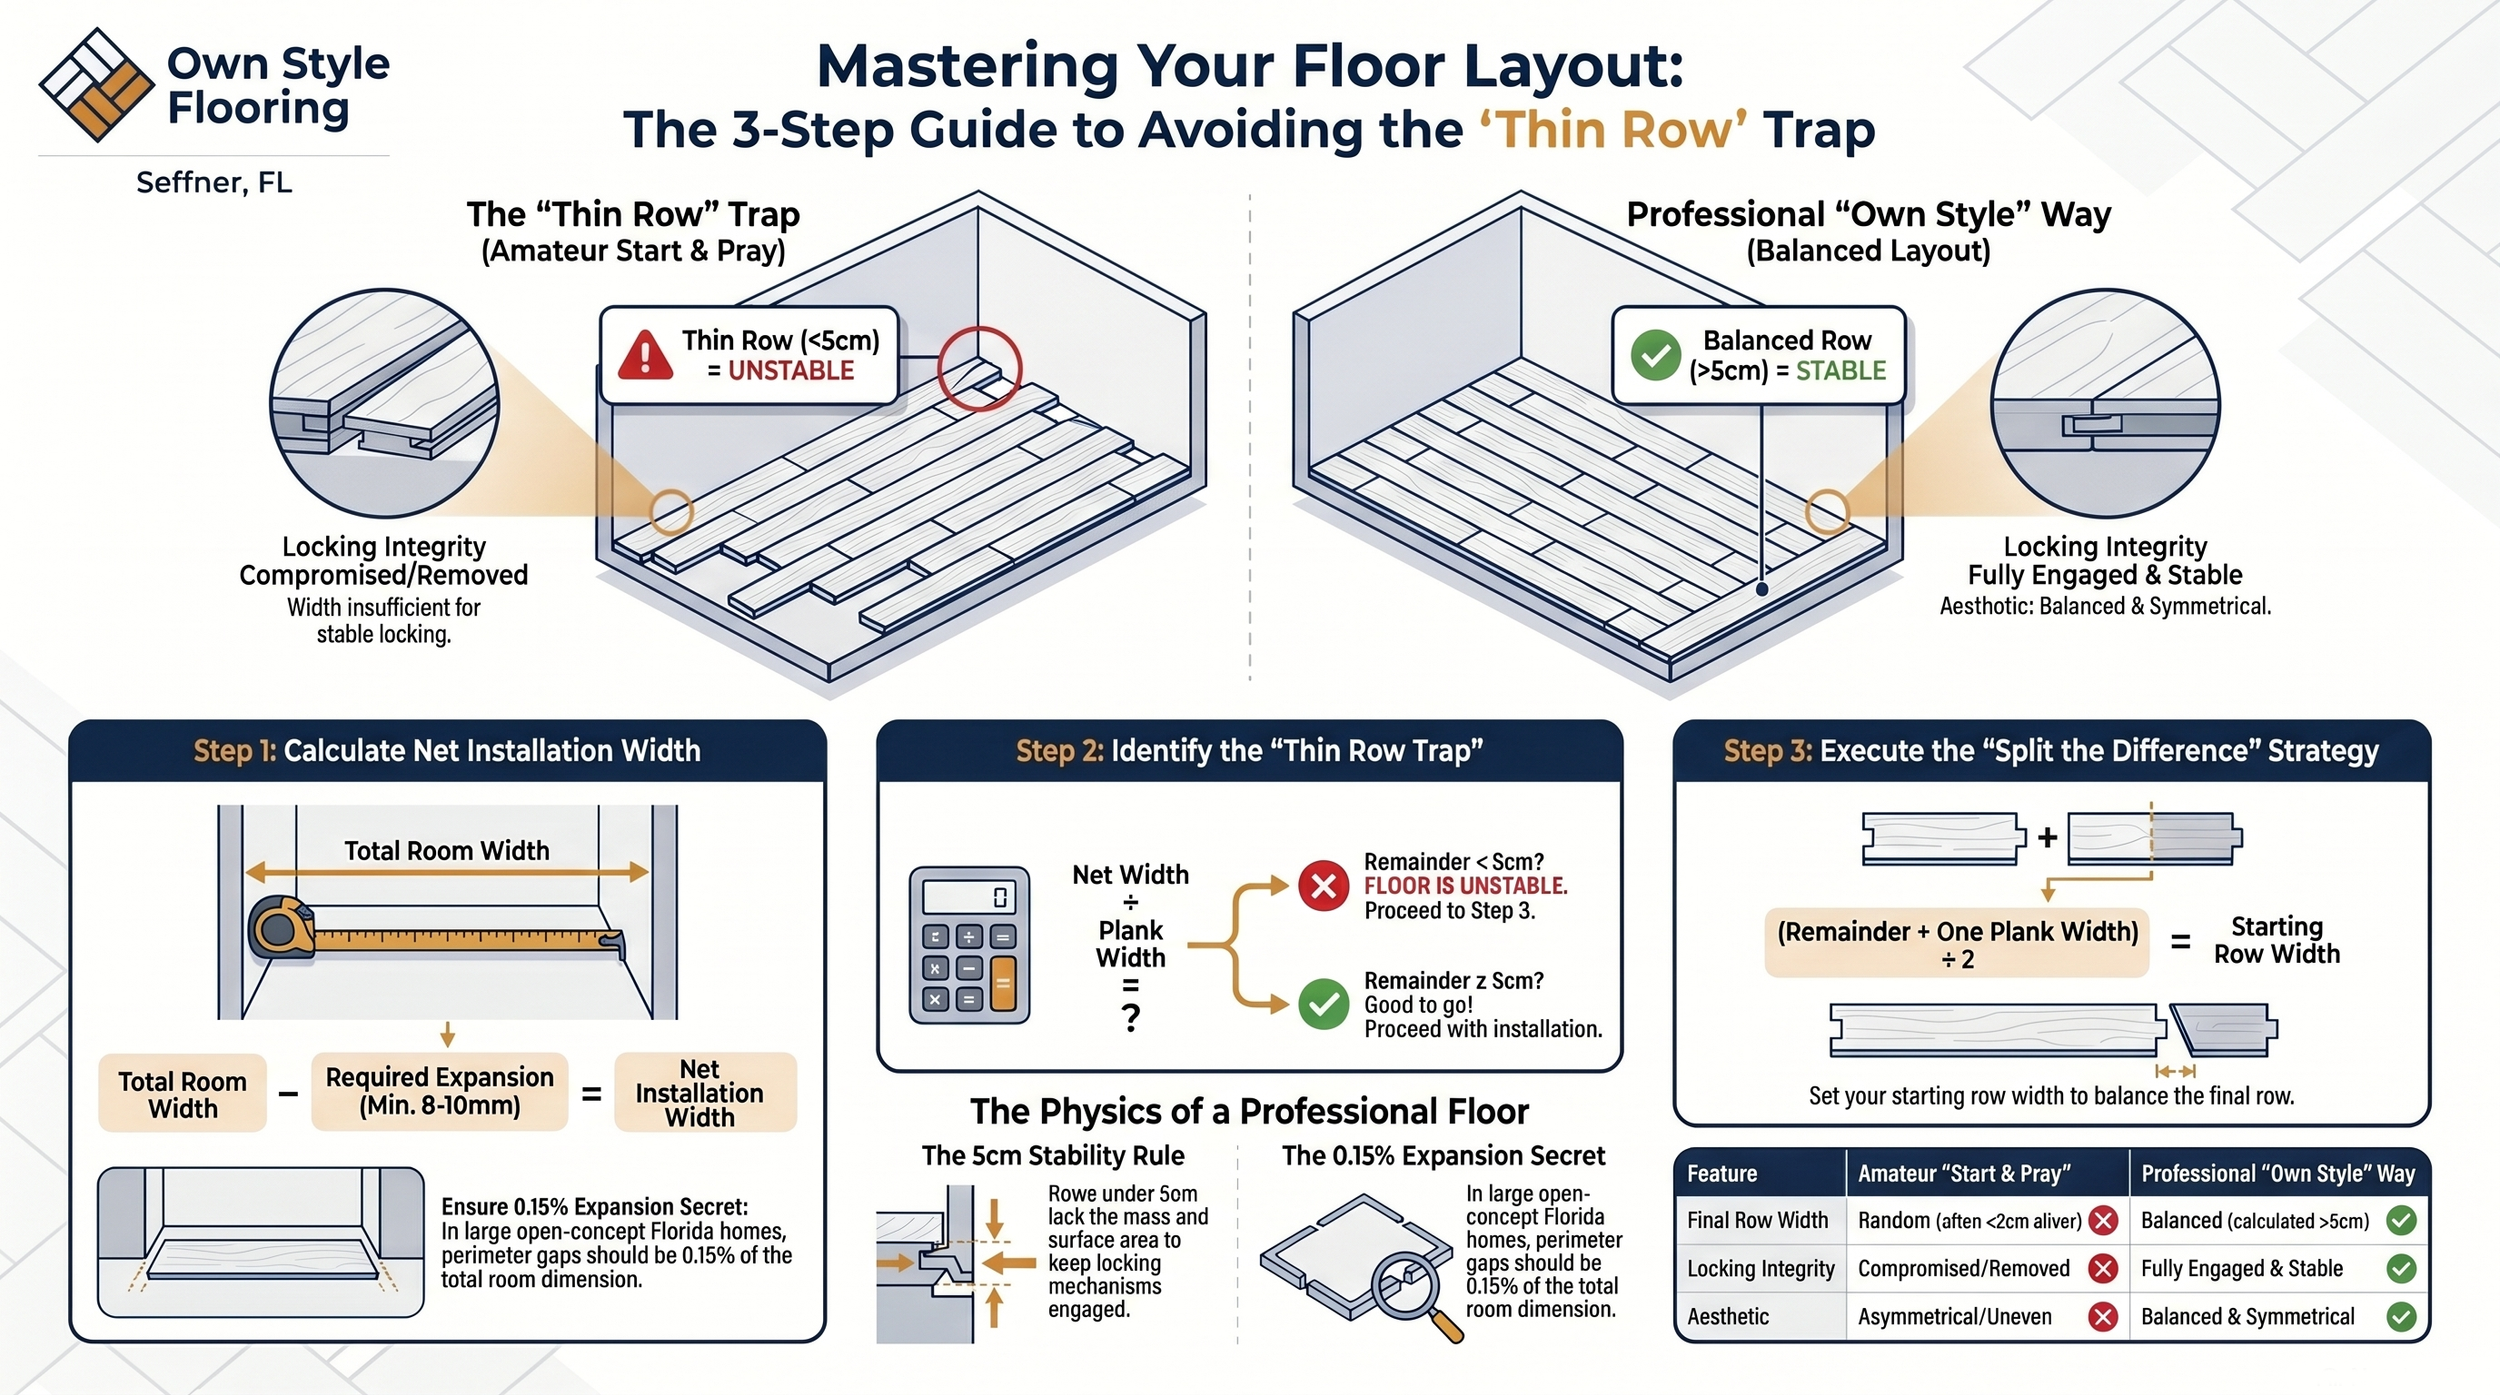
Why Is a Final Row Narrower Than 5cm a Structural Problem?
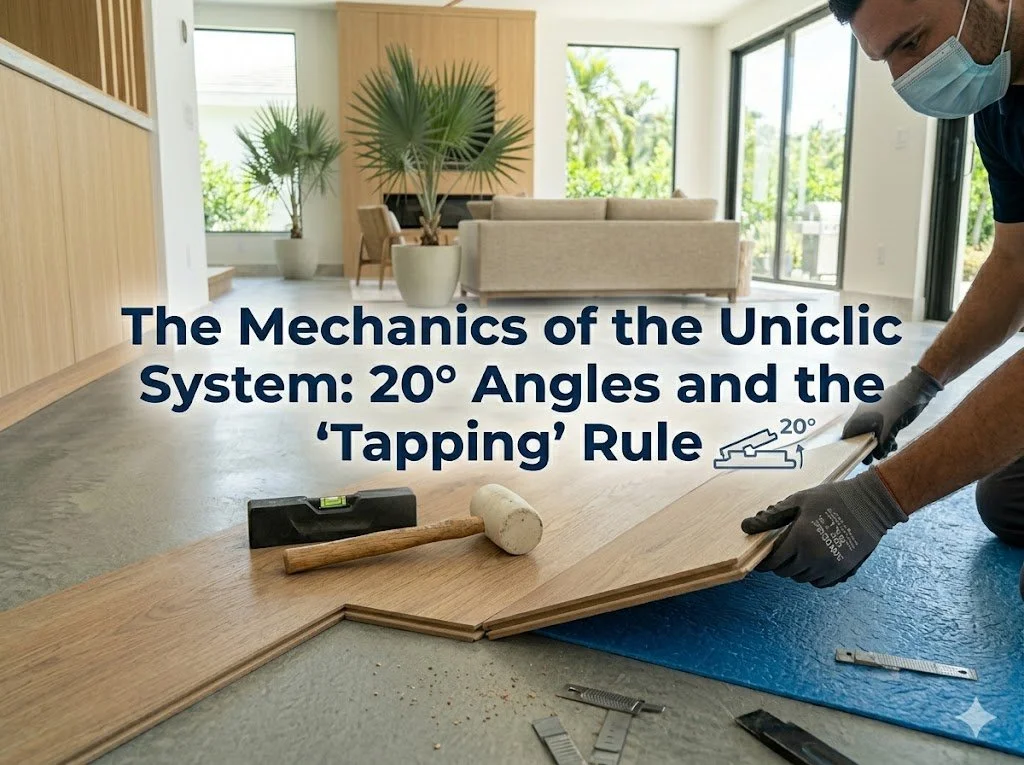
A laminate plank narrower than 5cm (approximately 2 inches) loses the mechanical conditions required for click-lock engagement. The Uniclic locking profile depends on two forces working together: the friction of the plank's mass pressing down on the subfloor, and the tensile strength of the locked tongue against the groove. A 2cm sliver has less than 11% of the mass of a full plank and often requires the tongue to be cut away to fit the space — eliminating the mechanical connection entirely. In high-traffic doorway areas in Wesley Chapel and Land O' Lakes homes, these unsupported strips lift within weeks of installation, creating a tripping hazard and an unresolvable gap.
What Is the Formula for Calculating Row Width Before Installation?
The row width calculation requires three inputs: total room width, total expansion gap allowance, and plank width. The sequence is:
- Net Installation Width: Total room width minus the sum of both perimeter expansion gaps (minimum 12mm per side = 24mm total)
- Row Count: Net Installation Width ÷ Plank Width = a whole number plus a decimal remainder
- Final Row Width: Decimal remainder × Plank Width = physical width of the last row in centimeters
Example: Room is 400cm wide. Plank is 19cm wide. Expansion gaps = 2.4cm total. Net width = 397.6cm. 397.6 ÷ 19 = 20.93 rows. Decimal 0.93 × 19cm = 17.7cm final row. This result is above 5cm — the layout proceeds as calculated.
Thin row example: 395.6 ÷ 19 = 20.82 rows. Decimal 0.82 × 19 = 15.6cm. Still acceptable. But 380.6 ÷ 19 = 20.03 rows. Decimal 0.03 × 19 = 0.57cm. This 0.57cm final row is a structural failure before the first plank is placed.
How Do You Adjust the Layout When the Final Row Is Too Narrow?
When the formula produces a final row narrower than 5cm, the professional adjustment is to "split the difference" between the first and last rows. Adding one full plank width to the thin remainder and dividing by two produces a balanced starting row that guarantees both the first and last rows will be the same width — structurally stable at both walls.
Adjustment formula: (Thin remainder + full plank width) ÷ 2 = adjusted first row width
Example: Thin remainder = 0.57cm. Full plank = 19cm. (0.57 + 19) ÷ 2 = 9.785cm. The starting row is ripped to 9.8cm. The final row will also measure approximately 9.8cm — fully locked, visually symmetrical, and mechanically stable under Tampa Bay humidity cycling throughout the year.
What Tools Are Required for Precision Geometric Layout?
| Tool | Purpose | Why It Matters |
|---|---|---|
| Steel tape measure | Net width and plank measurement | Plastic tapes stretch by 0.5–1mm — error compounds across 20 rows |
| Laser level | Mark adjusted starting row line | Florida walls deviate up to 5mm from plumb over 10 meters |
| Sliding T-bevel (false square) | Capture non-90-degree wall angles | Older Palm Harbor and Clearwater homes rarely have perfectly square rooms |
| Calculator | Row count and remainder calculation | Mental math errors on a $5–9/sqft floor are expensive |
| Expansion spacers | Maintain perimeter gap during installation | Required at all walls, door frames, and fixed structures |
| Fine-lead pencil | Mark cutting lines on planks | Permanent markers bleed into HDF edges under humidity |
How Do Expansion Gaps Interact with Row Width Calculations?
The expansion gap must be subtracted from the room width before calculating row count — not added after. A 12mm gap at each wall (24mm total) removes 2.4cm from the net installation width. Calculating rows against the raw room width and then applying spacers at the end produces a net width error equal to the gap size, which shifts every row position and produces a final row that is 2.4cm narrower than calculated. As of 2026, Own Style Flooring uses 12mm spacers as the default minimum in all Hillsborough County and Pasco County installations, and 15–20mm spacers in open-plan rooms exceeding 8 meters where the 0.15% expansion formula applies.
What Happens at Doorway Thresholds When Rows Are Not Pre-Calculated?
Doorway thresholds represent the highest-traffic zones in any residential floor — and the location where thin-row failures concentrate most visibly. A floor planned room by room without calculating how rows align at each doorway frequently produces a thin strip landing at the exact threshold where foot traffic is heaviest and lateral forces from door opening are most frequent. Correcting this after installation requires removing all planks back to the misaligned row, recalculating the layout for the entire connected space, and reinstalling from scratch. In New Tampa and Westchase open-plan homes, where a single floating floor runs through 3–4 connected areas, pre-installation layout calculation for the entire connected space is the only method that prevents threshold failures.
FAQ
-
The minimum final row width for laminate flooring is 5cm (approximately 2 inches). A row narrower than 5cm lacks the mass and surface area to keep the Uniclic locking profile engaged under foot traffic in Hillsborough County homes. Rows this narrow also require removing the locking tongue to fit the space, eliminating the mechanical connection entirely and creating a strip that lifts immediately under normal use.
-
Subtract your total expansion gap allowance (minimum 24mm for both walls combined) from the room width to get net installation width. Divide net width by plank width — the decimal remainder multiplied by the plank width gives the final row width in the same unit. If the result is less than 5cm, add one full plank width to the remainder and divide by two to calculate the adjusted starting row. Both first and last rows will equal this value.
-
Professional installers in Hillsborough County and Pasco County rip the first row to ensure the last row meets the 5cm structural minimum. Starting with a full plank and hoping for the best at the far wall is the method that produces thin-row failures. A ripped first row creates a symmetrical layout where both perimeter rows are the same width — structurally identical, mechanically stable, and visually balanced, which also protects the homeowner's $5–9 per square foot investment.
-
A 2–3mm underlayment absorbs minor surface texture and micro-irregularities in the concrete — grains, hairline variations, fine aggregate. Underlayment does not correct planimetry deviation. Any subfloor deviation exceeding 2mm over a 1-meter span, measured with an aluminum straightedge, requires a self-leveling or feather-finish compound before underlayment placement. Installing flooring over an uncorrected 3mm dip produces a visible dip in the finished surface and concentrates click-joint stress at the low point.
Other interesting topics
Other interesting topics