Planimetry Limits in Concrete Slabs: Correcting Uneven Subfloors Before Installation.
↘️Listen to the podcast on this topic.
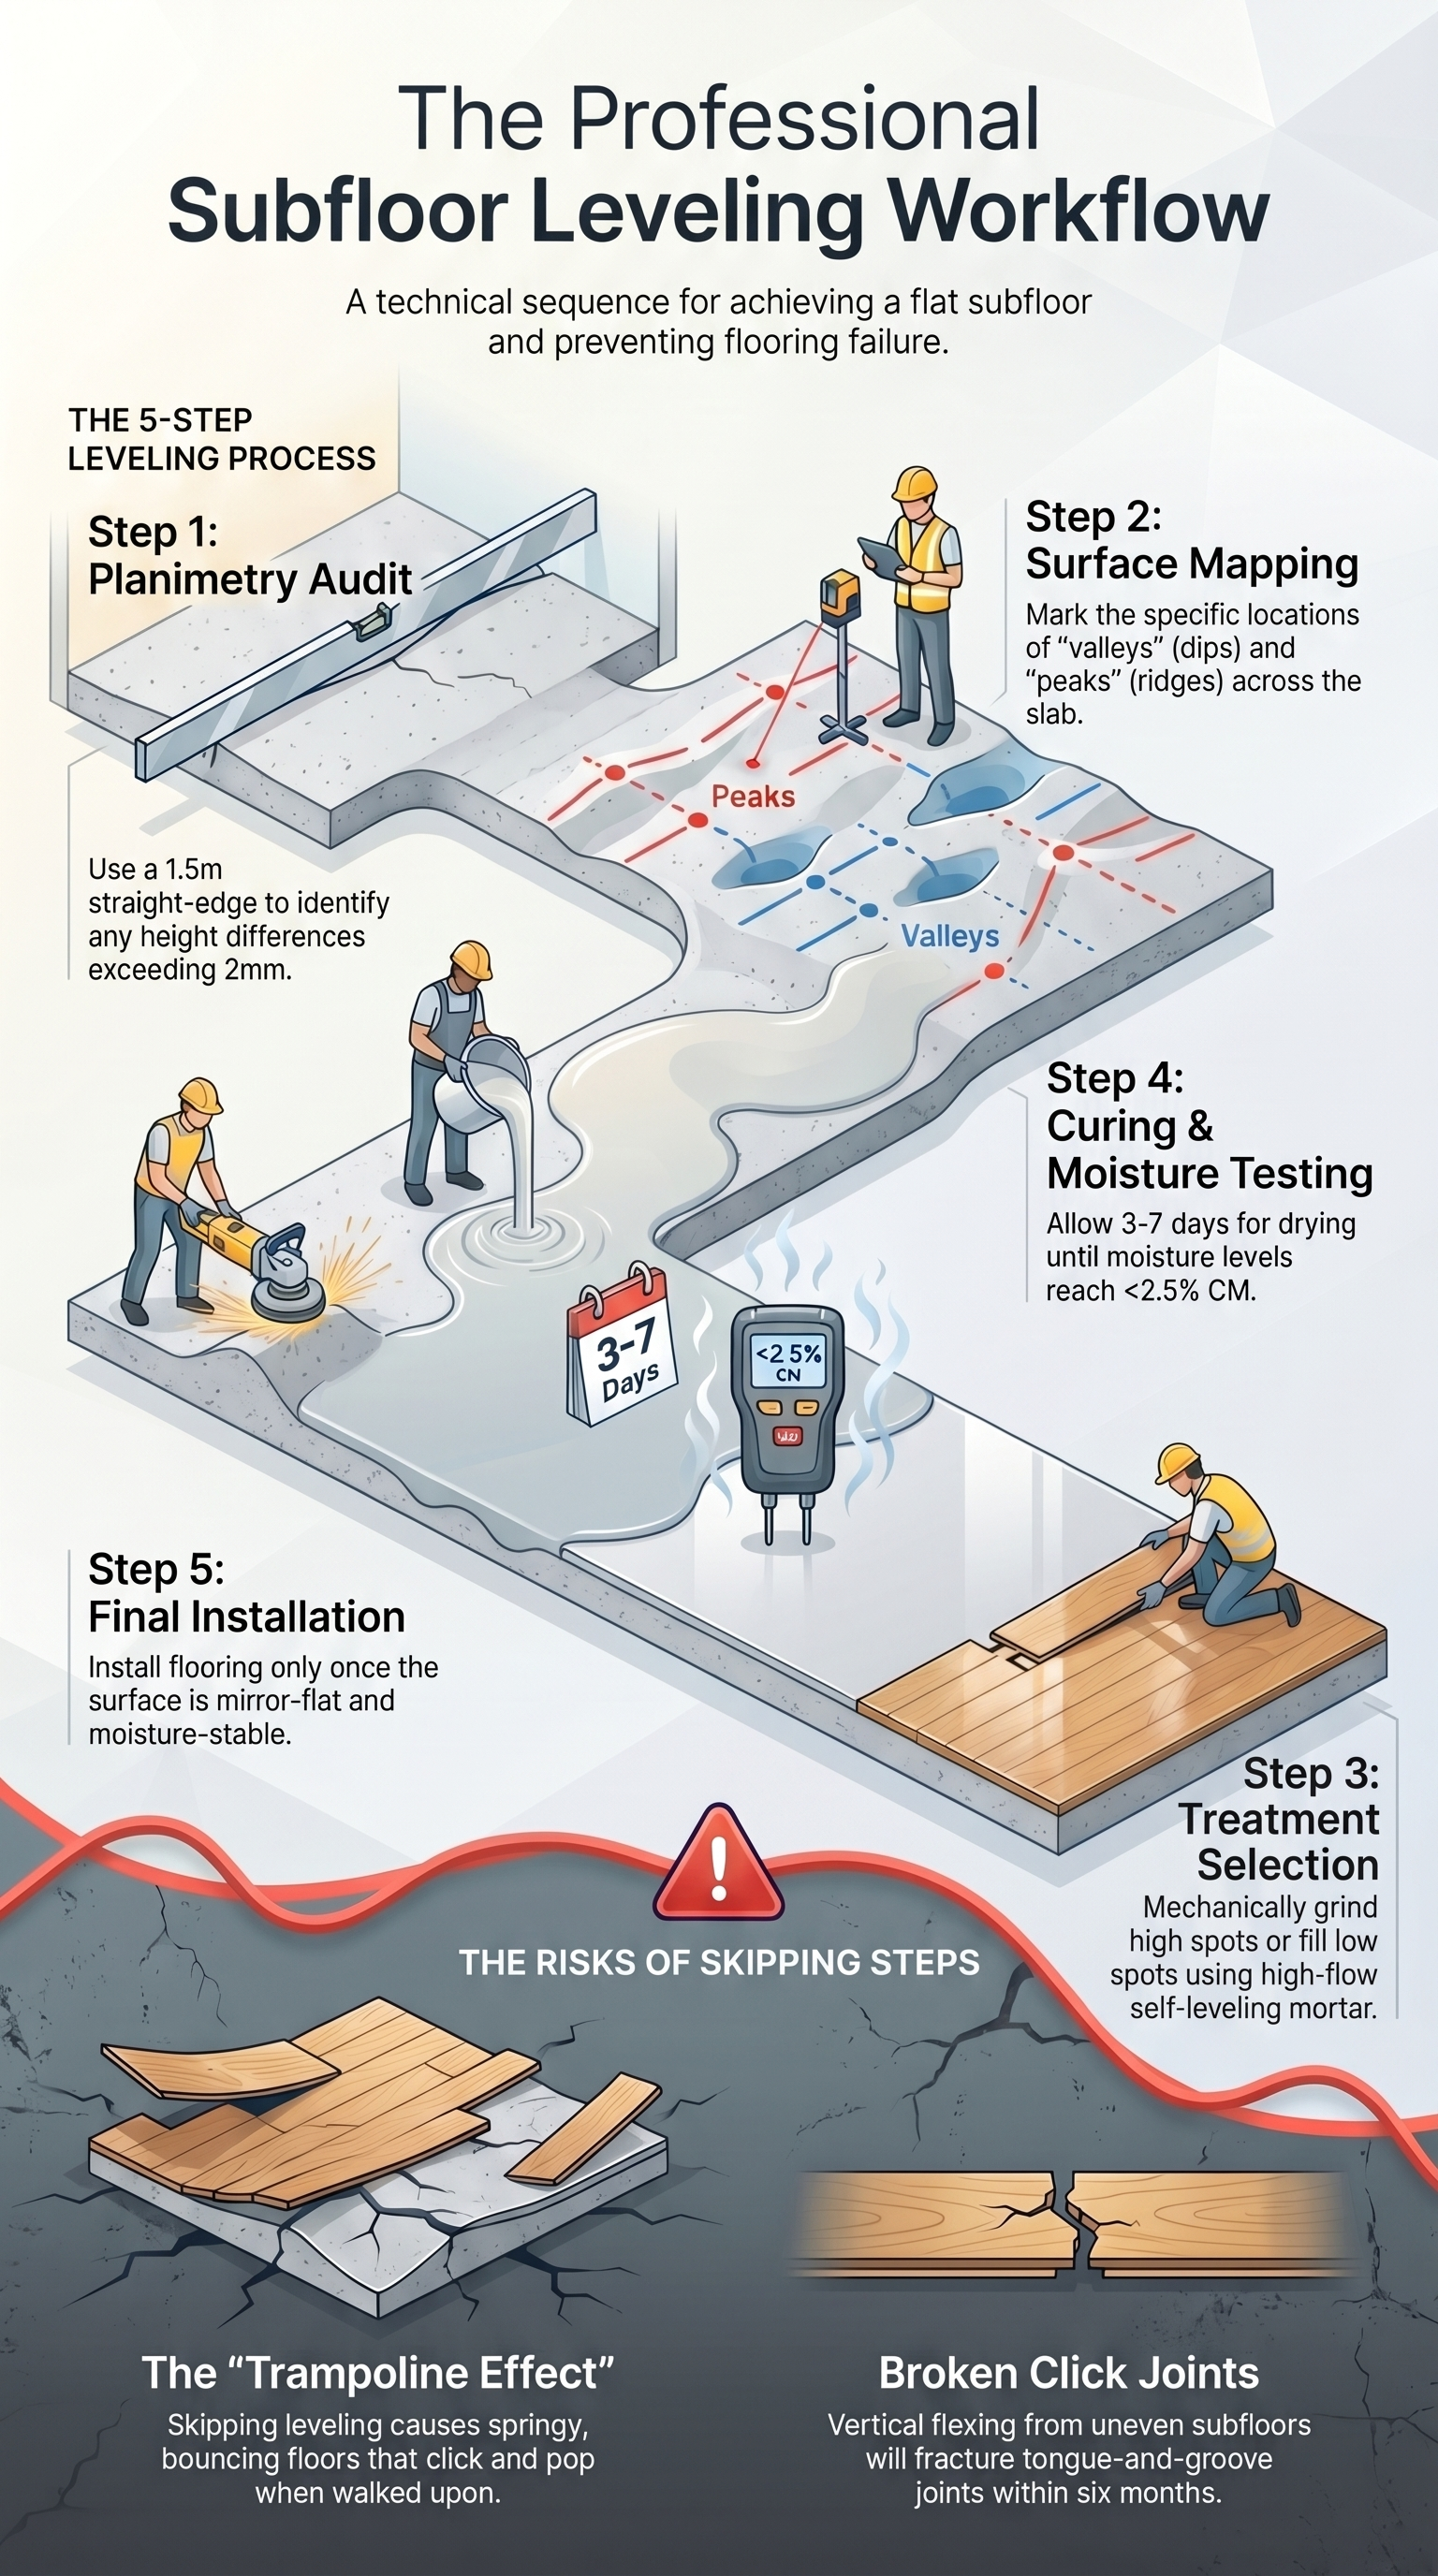
Concrete slabs in Tampa Bay homes must meet a planimetry tolerance of no more than 2mm deviation per meter before laminate flooring can be safely installed. Measured with a 1.5-meter aluminum straight-edge, this standard protects the click-lock joints from the constant vertical stress that occurs when planks bridge over valleys or ridges in the slab. In Hillsborough County's older housing stock — where settled slabs and patch repairs are common — planimetry failure is the second-most frequent cause of creaking and joint damage after moisture. High spots must be ground down mechanically; low areas require self-leveling mortar. Neither step can be skipped without compromising the installation warranty.
1. The 2mm Rule: Why Precision is Non-Negotiable
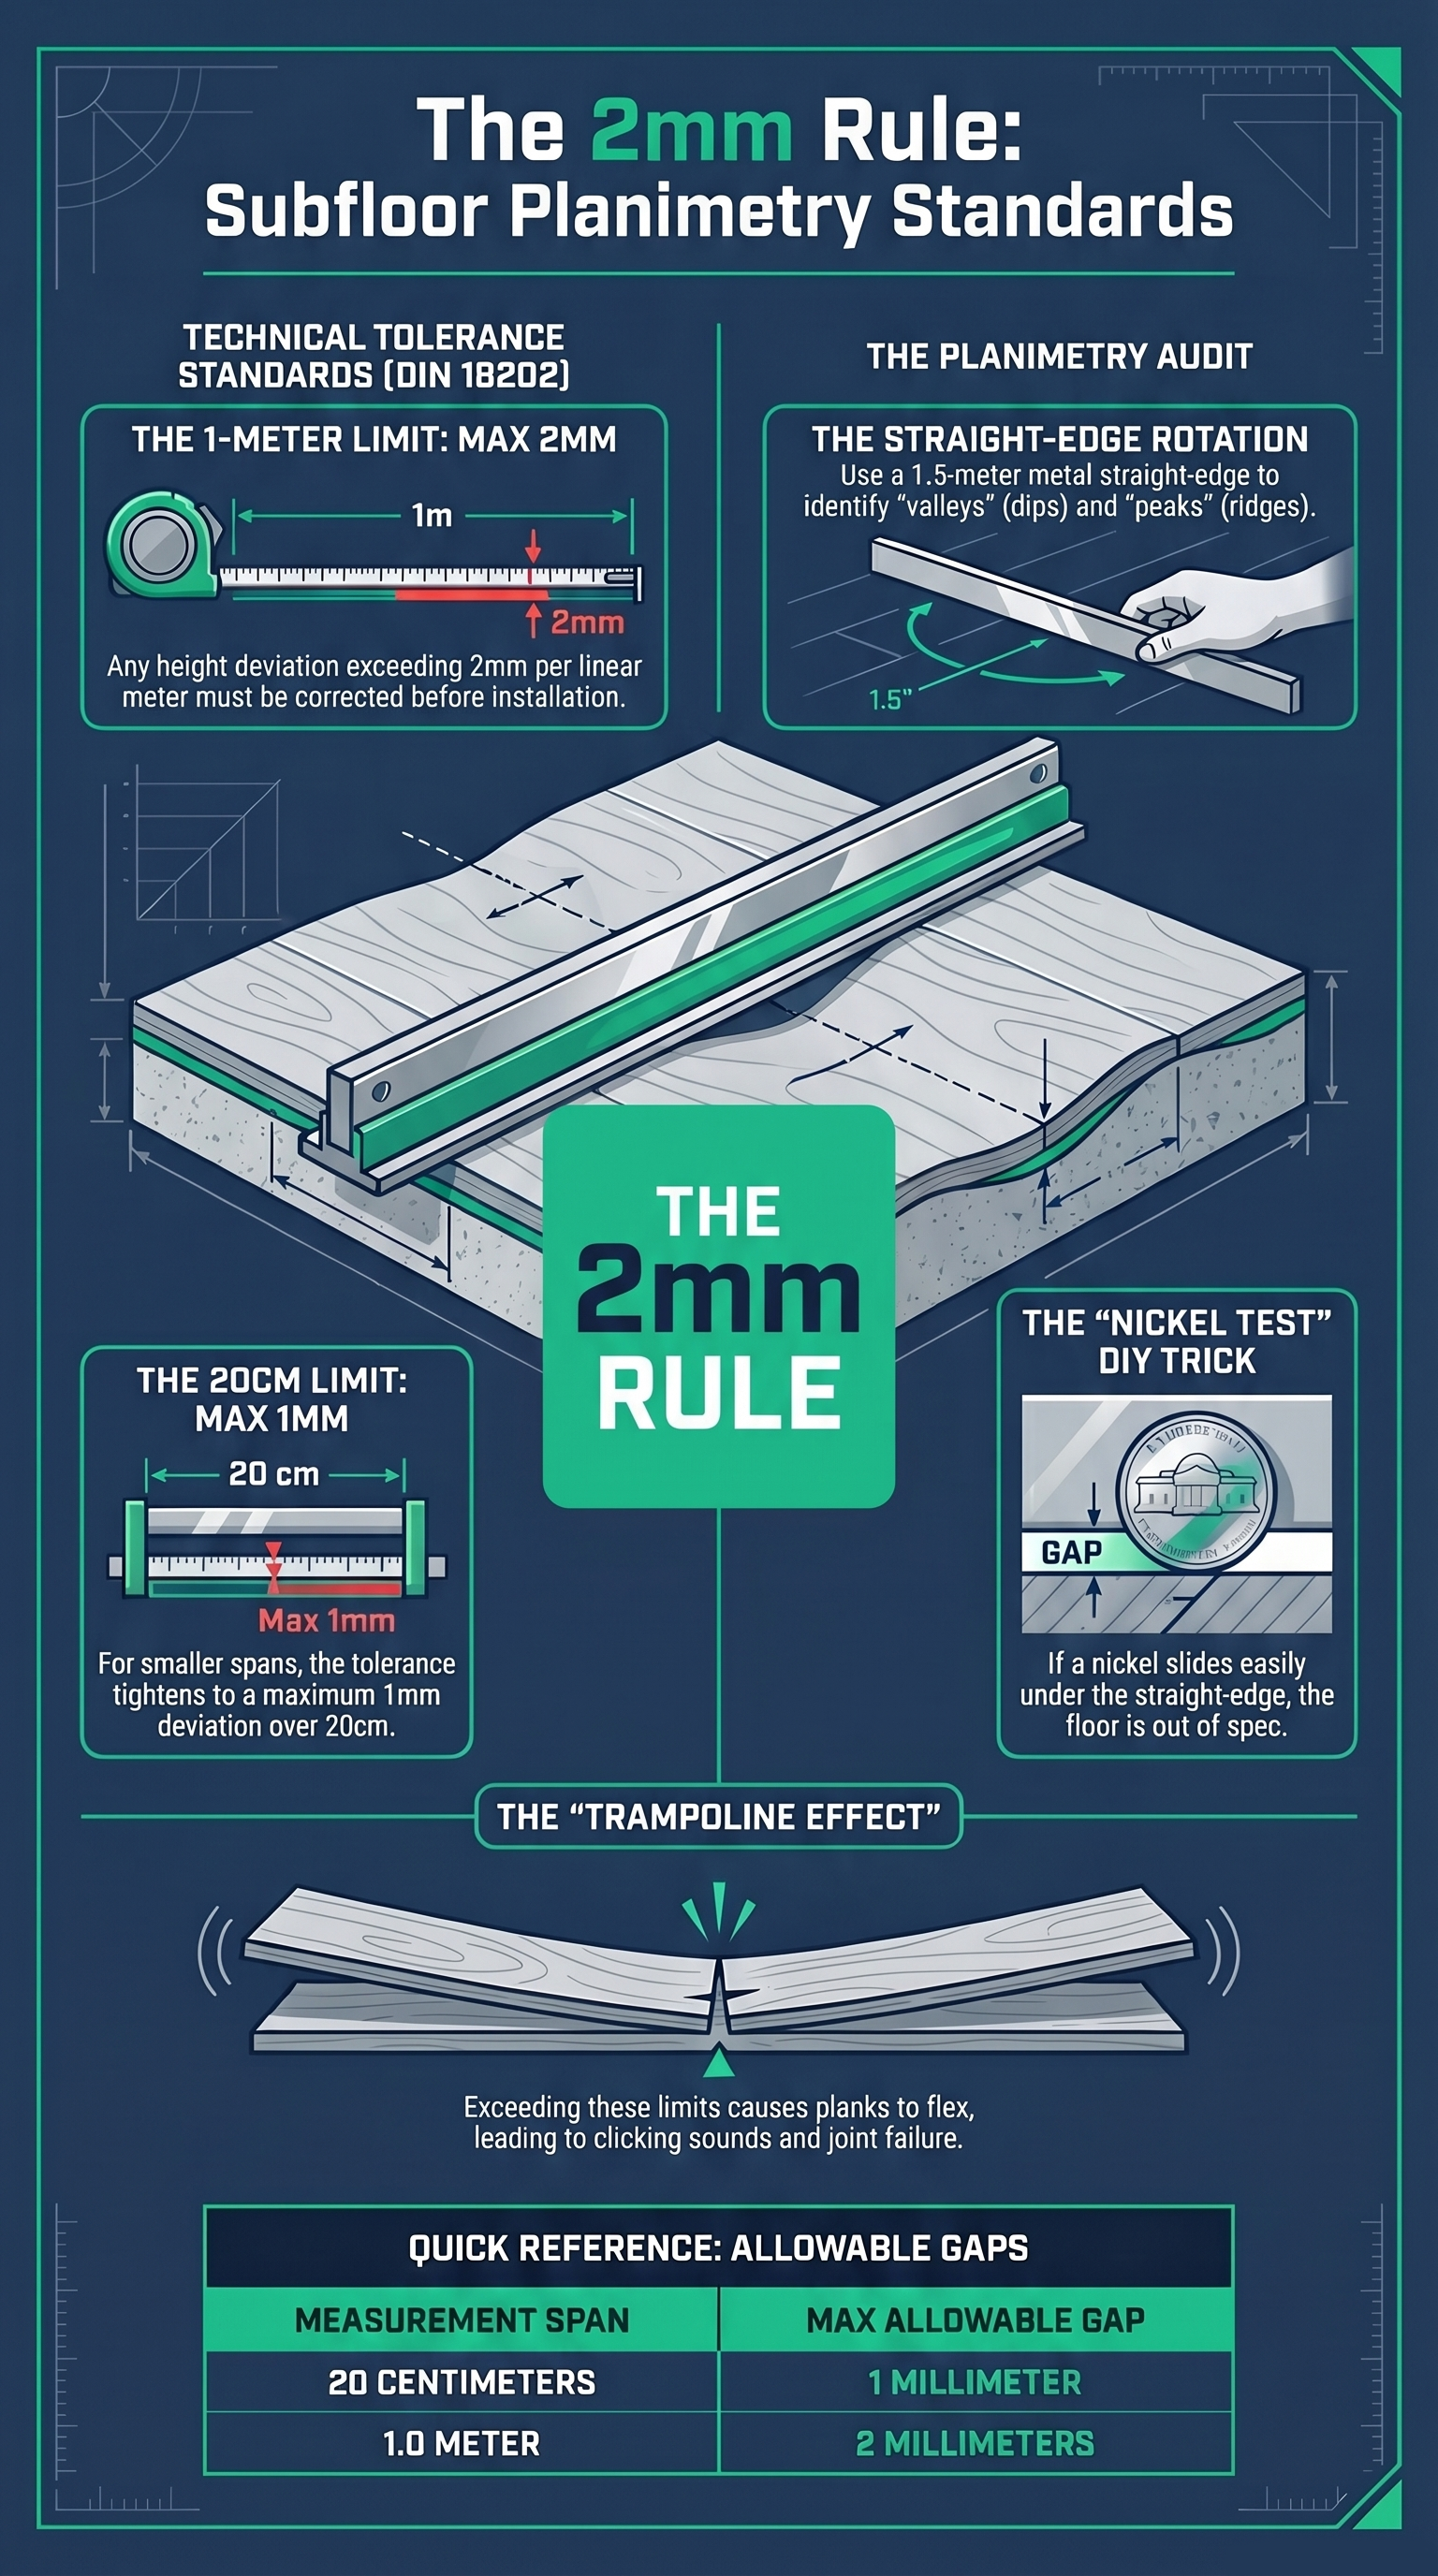
In the world of professional flooring, "flat" is not a suggestion; it is a requirement. According to engineering standards like DIN 18202, any height difference exceeding 2mm per linear meter must be corrected. For smaller sections, the tolerance is even tighter: no more than 1mm of deviation over a 20cm distance. When you walk across a laminate floor that wasn't properly leveled, the planks flex into the hollow spaces below. This "trampoline effect" creates friction in the joints, leading to the clicking and popping sounds often heard in poorly installed homes across Largo and Pinellas County.
2. Testing Your Slab: The Straight-Edge Method
Before laying a single plank, we perform a planimetry audit. We use a professional-grade aluminum straight-edge (at least 1.5 meters long) and a bubble level. By rotating the edge across the entire room, we identify "valleys" (dips) and "peaks" (ridges). A simple DIY trick is to try and slide a nickel under the straight edge; if it fits easily, the floor is likely out of spec. At Own Style Flooring, we map these areas specifically to determine whether the slab needs a "wet" fix (pouring material) or a "dry" fix (mechanical removal).
3. Corrective Measures: Self-Leveling Mortar
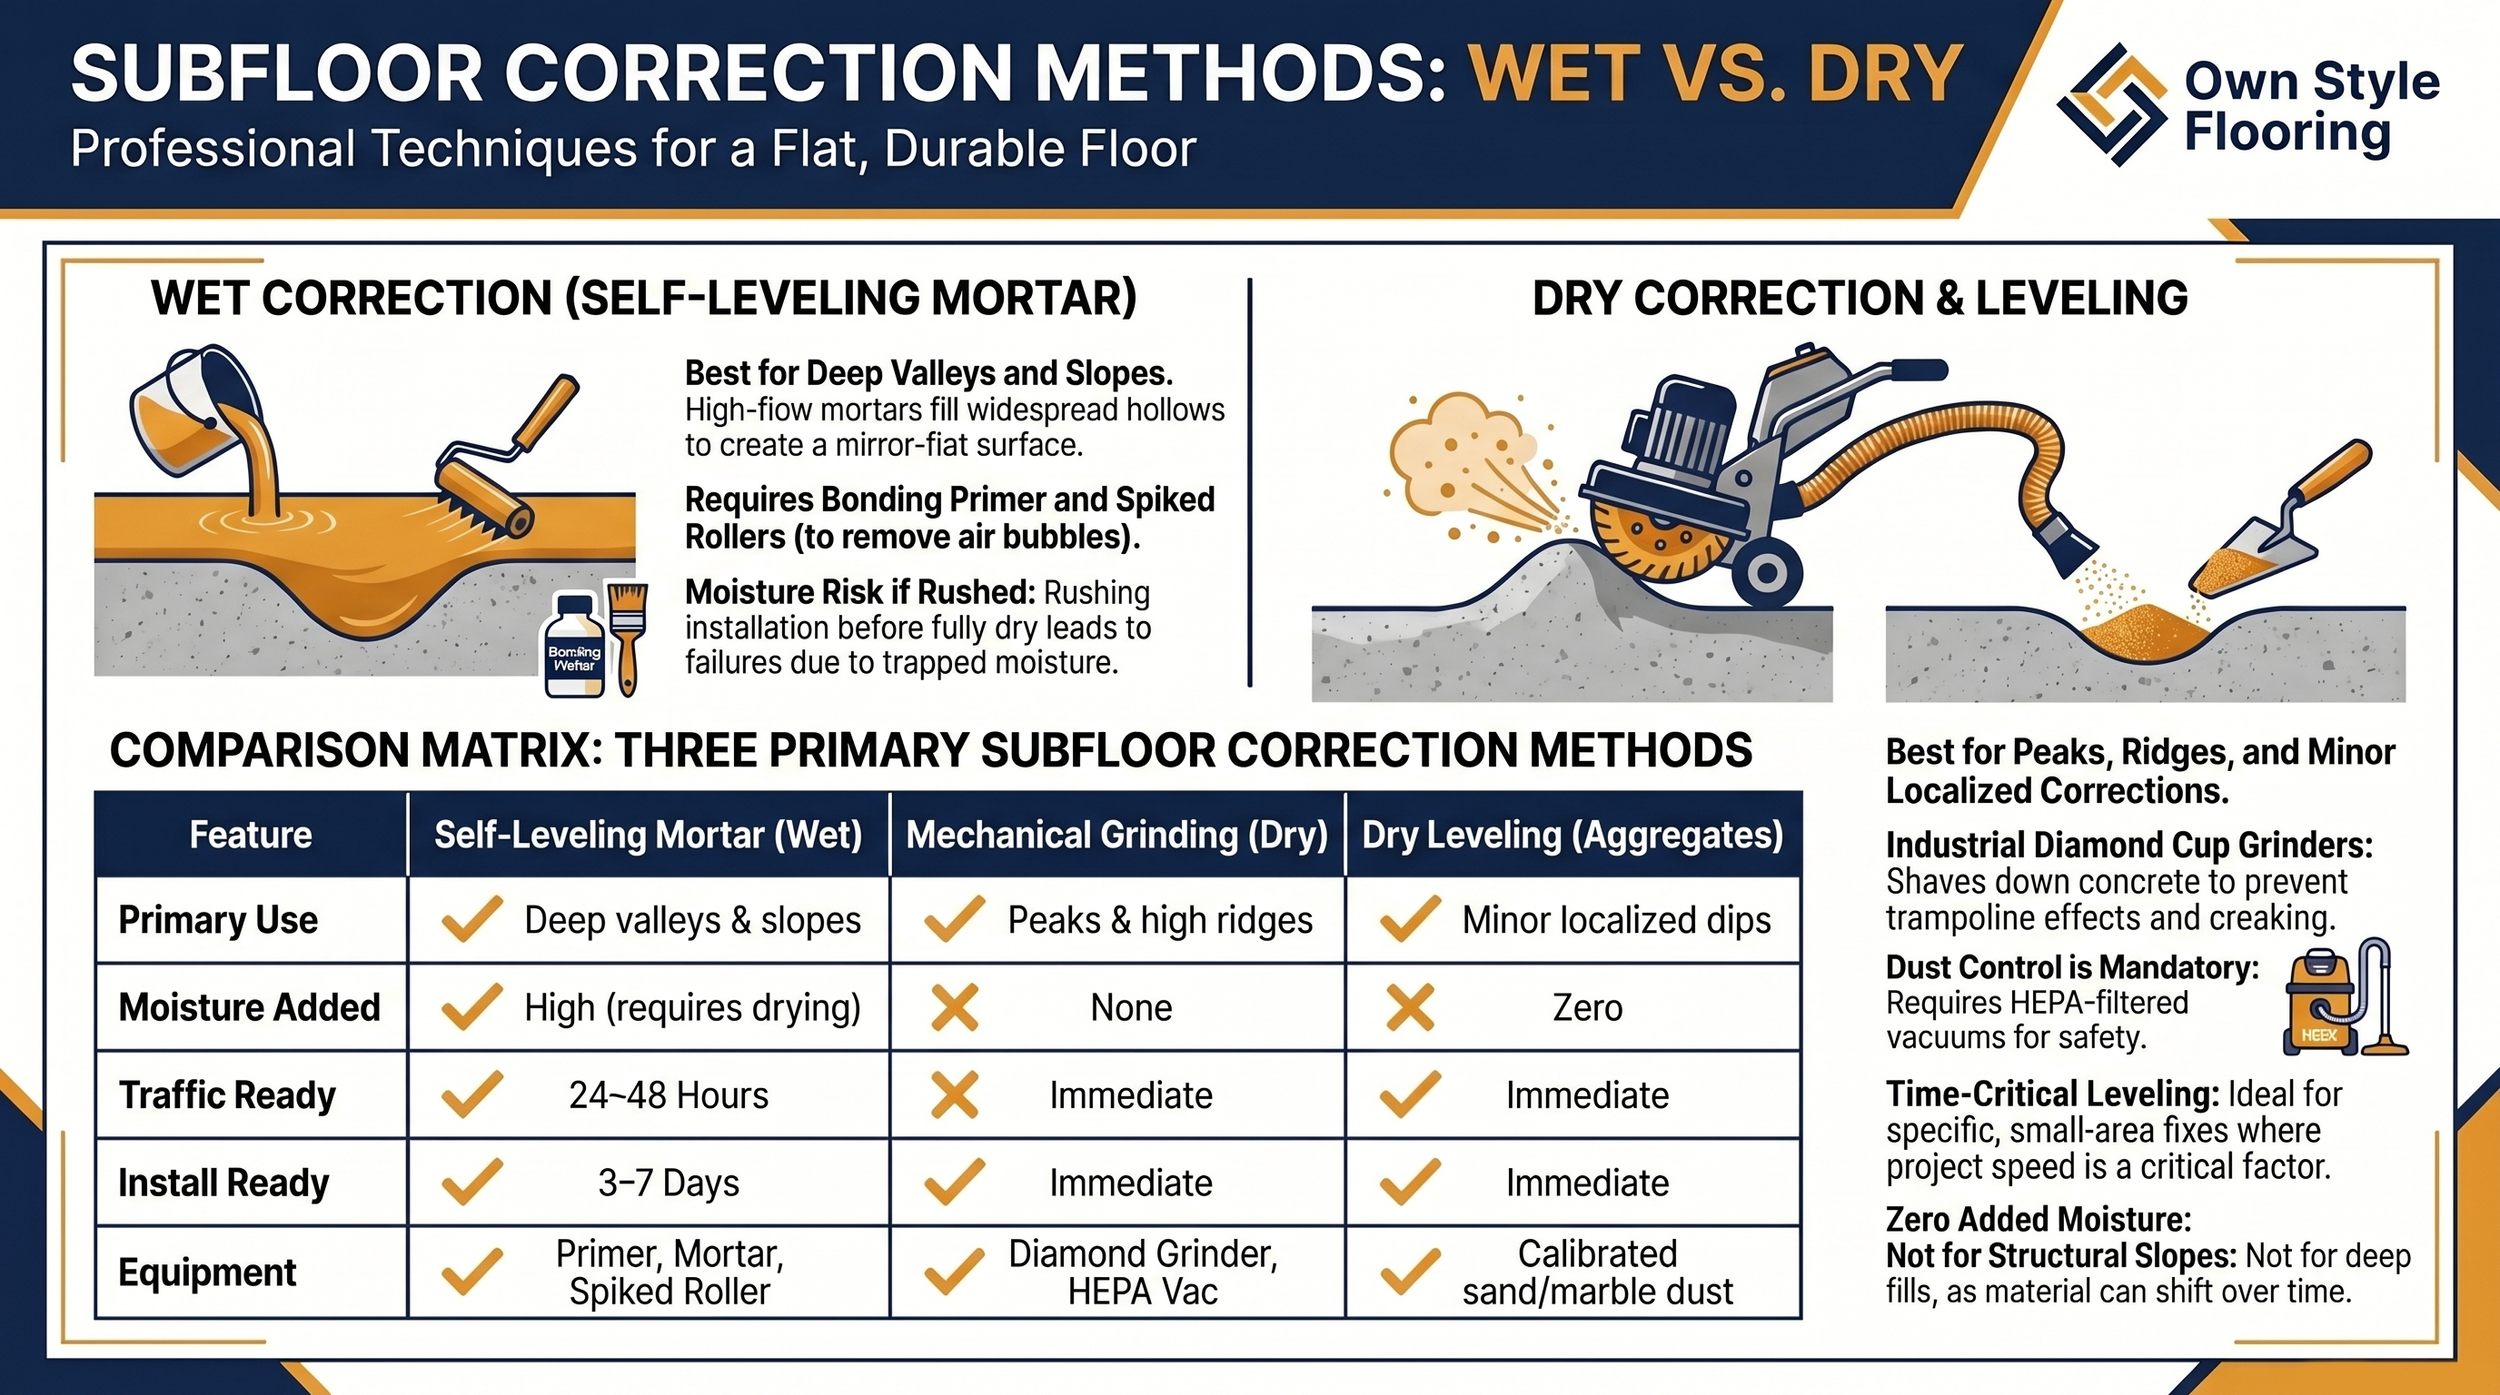
For widespread "valleys" or sloping floors common in older Tampa Bay homes, we utilize high-flow self-leveling mortars. This is a "wet" correction method. First, the concrete is primed to ensure the new material bonds perfectly to the old slab. We then pour the mortar, using a spiked roller to remove air bubbles that could weaken the structure. While this provides a mirror-flat surface, it requires strict drying times. Rushing this step traps moisture under your new floor, leading to the 85% failure rate discussed in our moisture testing guide.
4. Mechanical Grinding: Dealing with High Spots
Sometimes the problem isn't a hole, but a ridge. Ridges often form at the joints of concrete pours or where plumbing repairs were made. In these cases, pouring more leveler would only raise the entire floor height, potentially interfering with door clearances in your Seffner home. Instead, we use industrial diamond cup grinders connected to HEPA vacuums. This "dry" method grinds down the high spots until they meet the 2mm requirement. This is a dusty, intense process that highlights why professional equipment is vital for a clean home environment.
5. Dry Leveling with Fine Aggregates
In specific scenarios where time is of the essence and the unevenness is minor, dry leveling with calibrated sand or marble dust can be employed. This method is advantageous because it adds zero moisture to the environment, allowing for immediate installation. However, it is only suitable for localized corrections and should never be used to fix structural slopes. If the "fill" is too deep, it can shift over time, eventually recreating the very dips you tried to fix.
6. The Danger of the "Springy" Floor
If you ignore planimetry, you will experience a "springy" or "bouncing" sensation. This isn't just a comfort issue; it is a death sentence for your laminate. Laminate floors are designed to be "floating," meaning they move as a single unit. When one section sinks into a dip while the adjacent section stays firm on a ridge, the HDF core is subjected to "cleavage" forces. Within six months, the tongue-and-groove joints will fracture, and you will see visible gaps between your planks that no amount of tapping can close.
7. Professional Leveling vs. DIY Risks
Many DIY guides suggest that a thick underlayment (manta) can "hide" an uneven floor. This is a dangerous myth. Standard underlayment is only meant to correct micro-irregularities of 1mm or less. Using a thick, soft foam to bridge a 5mm gap actually makes the problem worse by increasing the vertical movement of the planks. By hiring Own Style Flooring at $5-9 per square foot installed, you are ensuring that the foundation of your home is engineered to last. We don't just "cover" problems; we fix the slab so your floor remains silent and solid for its entire lifespan.
-
No. Underlayment is designed for acoustic insulation and moisture protection, not structural leveling. Using extra-thick padding to hide dips will actually cause your laminate joints to break faster due to excessive vertical flexing.
-
If you place a 4-foot level on your floor and can see light underneath it, or if you can slide a stack of two pennies into a gap, your floor exceeds the 2mm tolerance and needs professional correction.
-
In the high humidity of Clearwater or St. Pete, self-leveler typically needs 24 to 48 hours for light foot traffic, but you may need to wait 3 to 7 days before installing laminate to ensure the residual moisture is below 2.5% CM.
-
Yes. Creaking is almost always caused by the subfloor being uneven. The noise is the sound of the locking mechanisms rubbing against each other as they flex into a hollow spot in the concrete.